
 |
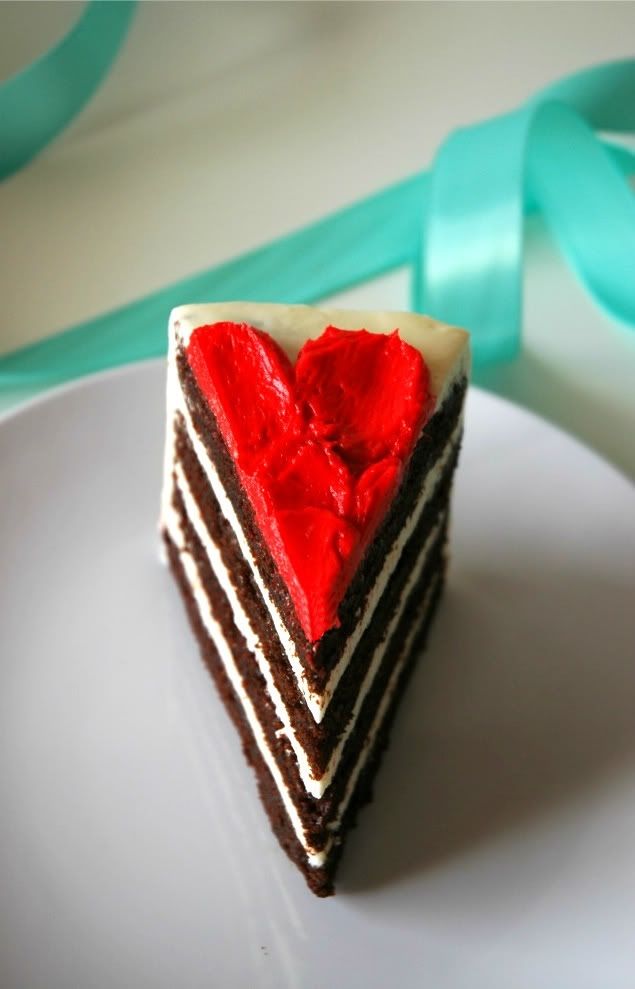
| The layers in this cake are the best looking ones I have ever made. So crisp! |

I initially wanted to have 8 layers in this cake, but there were so many crumbs after leveling the cakes off that I had enough of it. I despise crumbs. They're so pesky to wipe off the counter, and the world simply ends when they mix into the buttercream!
Surprisingly, this cake had me tied up in the kitchen for less time than the cupcakes last week. Check those out here! Basic cake and buttercream, with a little love and attention, can be transformed and molded into a slightly extravagant dessert. You literally dump all the cake components into a bowl, mix, and bake. Simple as that.
 The school club I'm in is very big on helping the community, so we handed out sandwiches to hobos near the school during this week's meeting. It's amazing how appreciative they were to receive organic, all-natural, whole grain peanut butter and jelly sandwiches. It seems as if everyone at school and the city are health nuts. There is a health food store on every block it seems. We not only gave the homeless people food, we gave them a nutritious and heart healthy supplement to their day. I also still can't believe I only have 3 months of school left. This year went by so fast! High school memories will soon be replaced with the experiences of college. Hurray!
 I wish I could have blown out the candles on a cake like this when I was younger. So much nicer than those scary barbie cakes from Wal-mart. They're terrifying. Why kind of baker contrived this idea? Why kind of kid begs their mommy for a piece of cake with a plastic doll shoved into it? It's almost as creepy as those people who order custom cakes sculpted in the shape of their dogs. When you eat it, you have to cut into it, so essentially you're carving your dog up and consuming it with a sheepish grin because the cake tastes good. Or cakes that have family pictures printed on them. That's disturbing too. Imagine a little kid saying, "Look mommy, I'm eating Aunt Suzy's eye!" I shall not judge though. Eat whatever shape, size, or type of cake that floats your boat, but please just eat cake that tastes good! Enjoy!

Decorating Tutorial

From Sweetapolita
INGREDIENTS
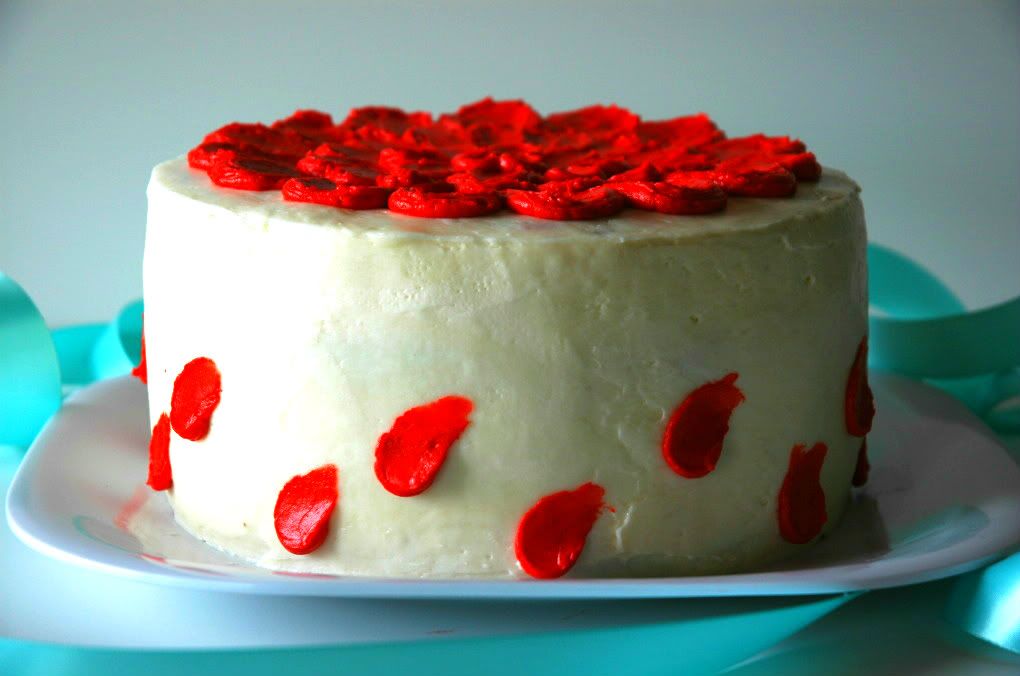
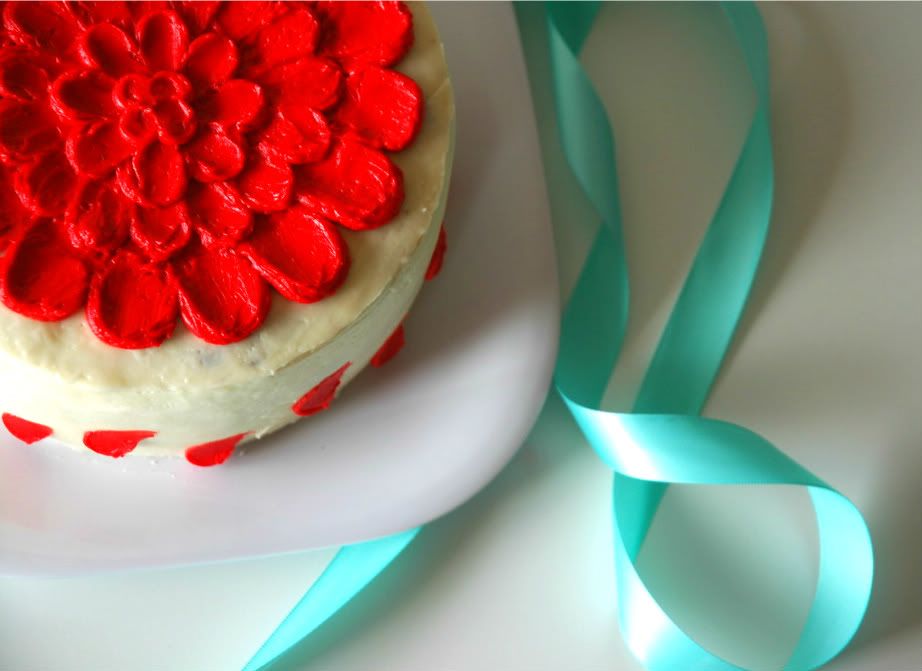
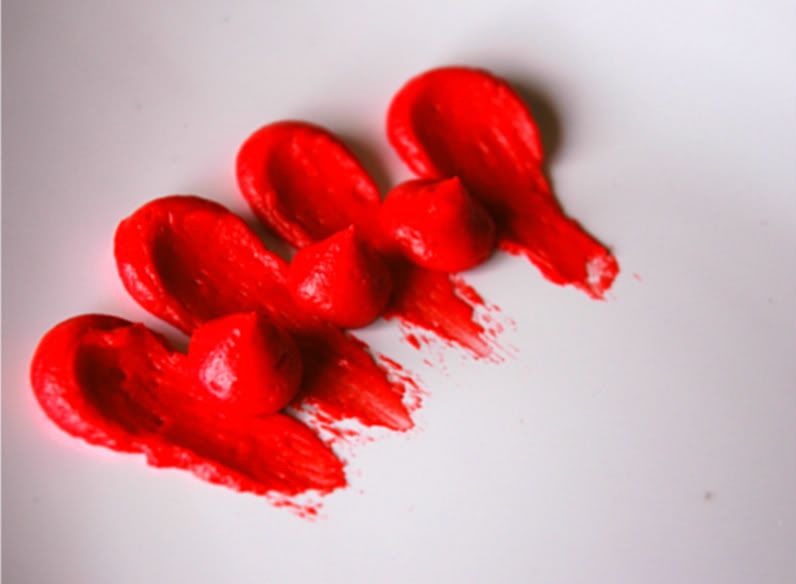
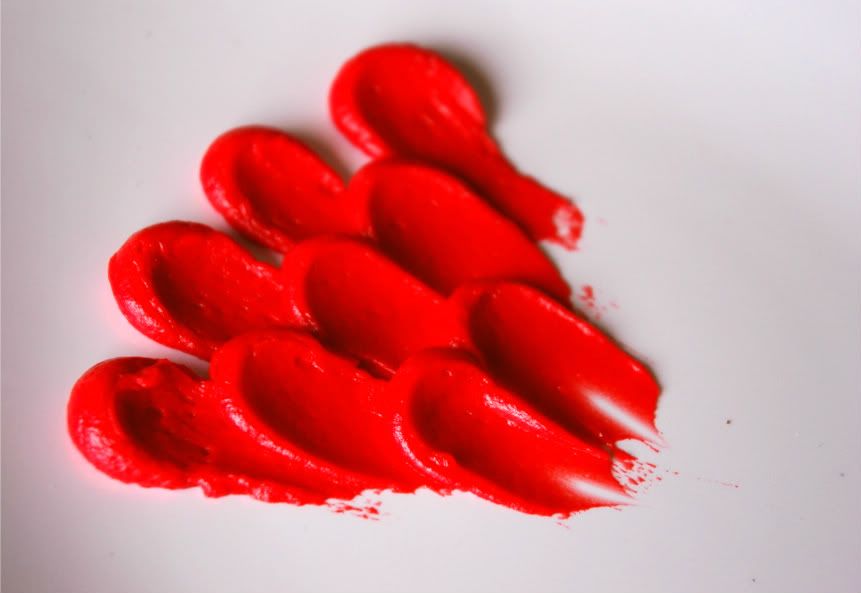
- You'll want to fill and dirty ice your cake. Then go back with another layer of buttercream to create a smooth surface.
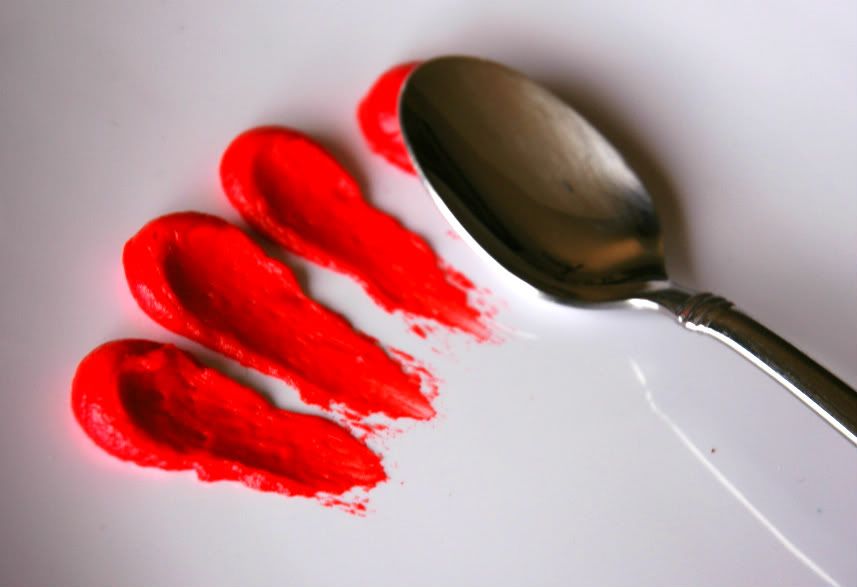
- Dye the remaining buttercream any color that your please, and then transfer to a piping bag with a round tip.
- Starting from the edge, pipe dollops equal in size. Then take an off set spatula or a spoon, and with a sweeping motion, smooth the mounds of frosting.
- Continue piping concentric circles of frosting and repeating the process above until you reach the center.
From Sweetapolita
INGREDIENTS
- 1 3/4 cups all-purpose flour
- 2 cups granulated sugar
- 3/4 cup cocoa powder
- 2 teaspoons baking soda
- 1 teaspoon baking powder
- 1 teaspoon salt
- 2 eggs
- 1 cup strong black coffee (can be hot)
- 1 cup buttermilk, room temperature
- 1/2 cup vegetable oil
- 1 tablespoon pure vanilla extract
Preheat oven to 350 degrees Fahrenheit
- In bowl of electric mixer, sift all dry ingredients.
- Add all remaning ingredients to bowl with the dry ingredients and with paddle attachment on mixer, mix for 2 minutes on medium speed. It will be liquidy.
- Pour batter in pans lined with parchment paper and bake until toothpick inserted in the center comes out clean.
From Magnolia Bakery
INGREDIENTS
- 4.5 tablespoons all-purpose flour
- 1 1/2 cups milk
- 1 1/2 cups unsalted butter, room temperature
- 1 1/2 cups sugar
- 1 1/2 teaspoons vanilla extract
- In a medium saucepan, whisk together the flour and milk until smooth. Over medium heat, and whacking constantly, cook until the mixture becomes thick and begins to bubble. Cover surface with wax paper and allow to cool to room temperature.
- In a large mixing bowl, beat butter until smooth and creamy on medium high speed. Gradually add the sugar, and beat until fluffy. Add in the vanilla and beat well.
- Add in the milk mixture and continue to beat on medium high speed until smooth and whiter in color. Cover and refrigerate for 15 minutes. Use immediately.
All I can say is: Oh. My. God. Such a vibrant red color. I love chocolate cake.
ReplyDeleteI love chocolate cake too. Daddy wouldn't let me throw away the scraps, and he finished munching on them this afternoon. I really like the recipe. It's a plus that it's easy and tasty!
DeleteTHIS CAKE IS ABSOLUTELY PERFECT!!! Happy 1st blogiversary! The vibrant red colour of the frosting and the chocolate cake inside is truly amazing! I cannot fault this. You got the frosting super smooth and my cakes are no where near perfect as yours.
ReplyDeleteThank you! It took me forever to smooth the frosting out because I whipped it too much so there were so many air bubbles. My cakes are nowhere near perfect:P I'm still honing my decorating skills!
DeleteI stumbled across your blog via the prettyfoods tumblr and have pored through everything you've posted. I am super jealous of your skills and baking artistry. You do some lovely work and I can't wait to try some of these out at home!
ReplyDeleteThank you! I really appreciate that you looked through my other posts. Happy baking!
DeleteMy brother really wants me to make this beautiful cake for his birthday next week, so I guess I'll try.
ReplyDeleteDo you think I can make it on the day before and keep it in the fridge?
Definitely! Be sure to set the cake out at room temperature for about an hour before serving to ensure it isn't cold. Refrigerated buttercream is difficult to slice into neatly. Good luck!
DeleteThank you so much for your reply. I'll try my best tomorrow. And then we'll have to bring it to the birthday party anyway, so it'll have some time to warm up. ;-)
ReplyDeleteI did it ... kind of. ;-)
ReplyDeleteSomehow I only got two layers out of the amount of cake, and there wasn't enough buttercream. So if I do this again (likely), I'll just use the mini pan. ^^
In the meantime I'll probably experiment with thicker frostings to get the hang of this.
And one last question: How does your buttercream look so white?!