My tips for these cookies:
- Freeze the hearts before baking so they can better retain their shape. Pop them in the freezer for 30 or so minutes until firm. (I ended up just watching the latest Big Bang Theory episode. Oh Sheldon is just too funny.)
- Use more or less cream for the center depending on how gooey you want the caramel. If you use the full amount, the caramel will not set very well, so it would be difficult to pack these to give away.
- I ended up baking these for 18 minutes instead of the 12 minutes recommended.
- Not to be OCD or anything, but if you want to obtain the full yield each dough ball should weigh around 15-16 grams before you add the pecans.
Here's a little tutorial!
(I resized these pictures to be smaller because they came out quite blurry. Sorry!!!)
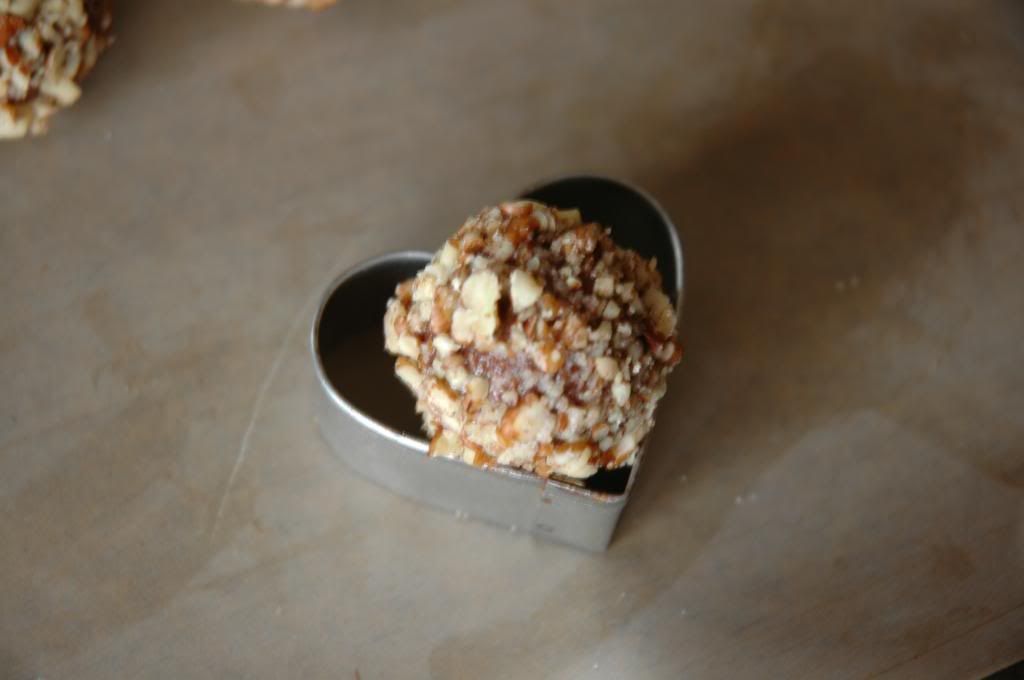
Plop a cookie into the center of a small heart shaped cookie cutter.
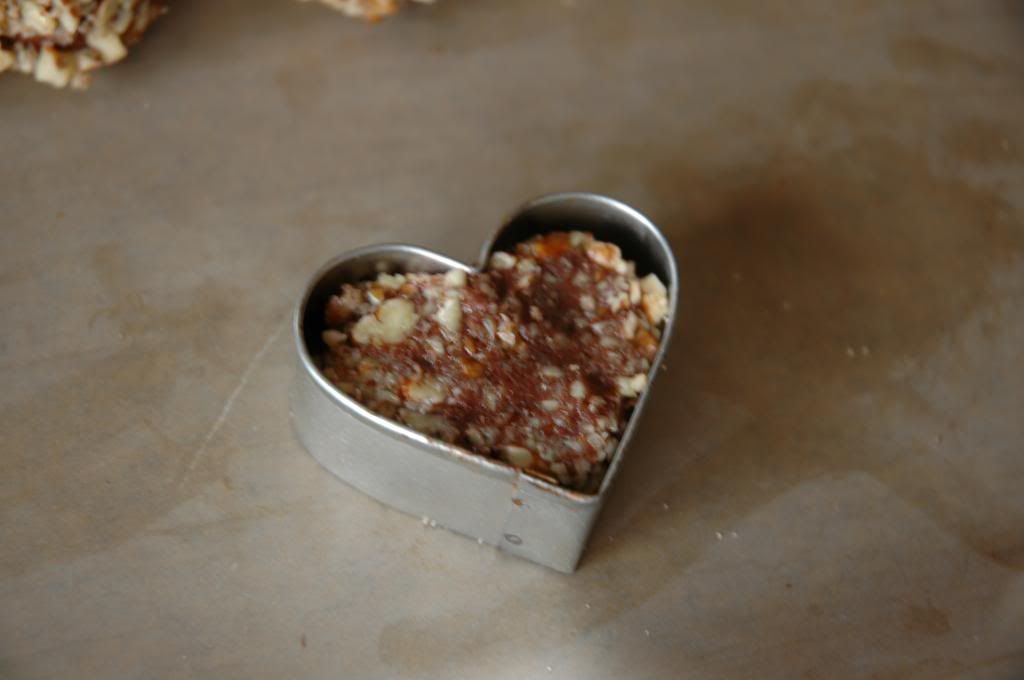
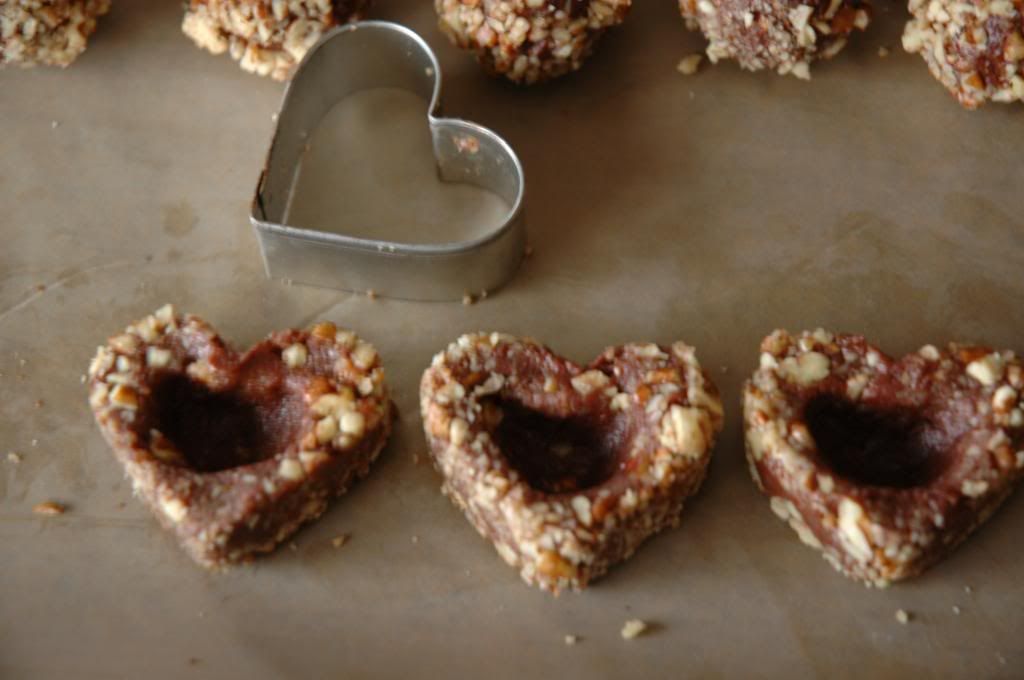
Gently press the dough into the shape of the cookie cutter.
Using a teaspoon, or your fingers, make an indentation in the center. Gently push the the heart out of the mold.
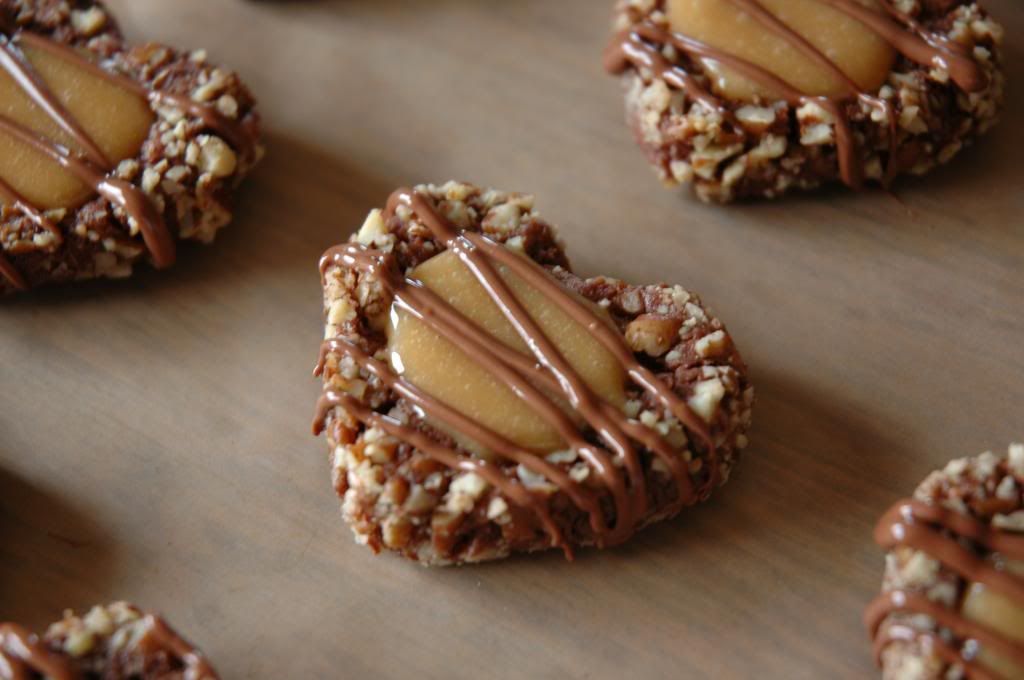
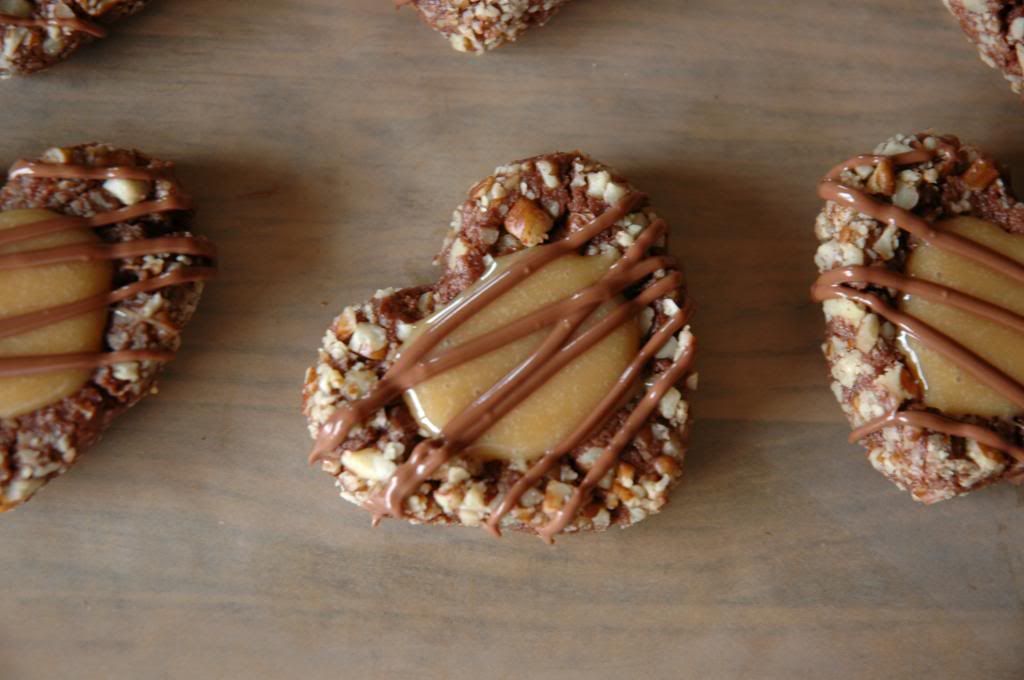
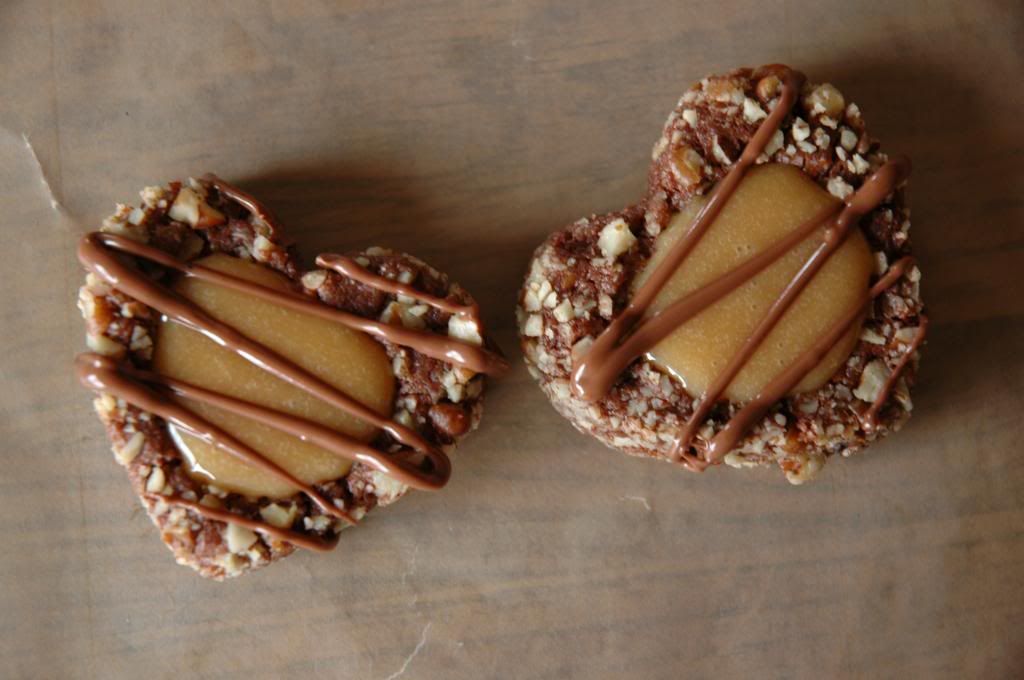
Salted Caramel Turtle Heart Cookies
INGREDIENTS
From America's Test Kitchen
Yields 2.5 dozen cookies
- 1 cup all-purpose flour
- 1/3 cup cocoa powder
- 1/4 teaspoon salt
- 8 tablespoons (1 stick) butter, softened
- 2/3 cup sugar
- 1 large egg, separated, plus 1 egg white
- 2 tablespoons milk
- 1 teaspoon vanilla extract
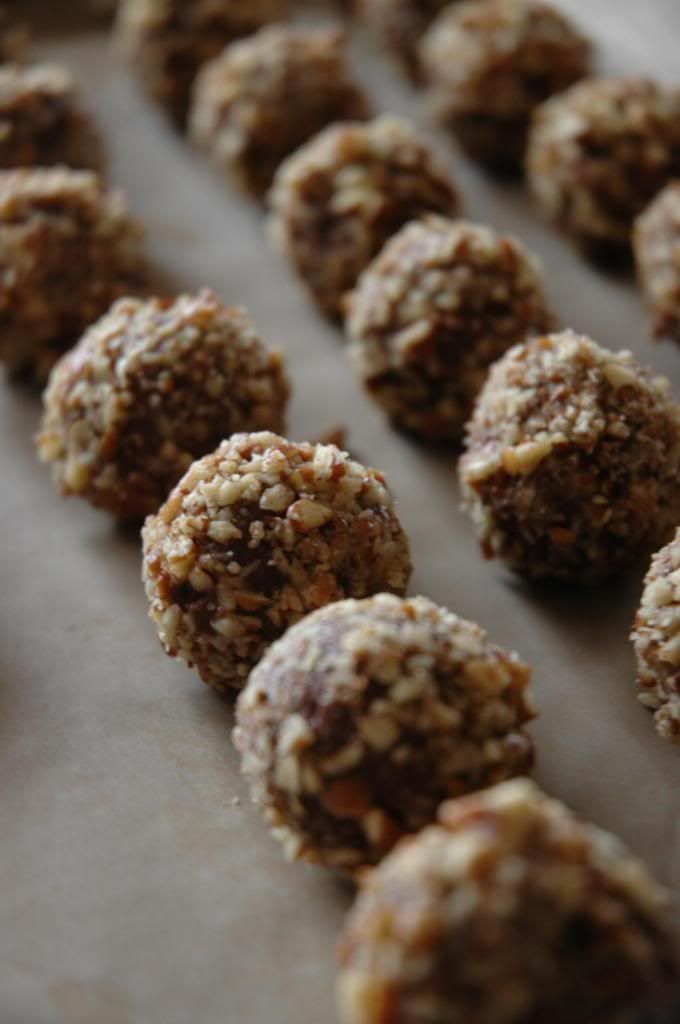
- 1 1/4 cups pecans, chopped fine
- 14 soft caramel candies
- 3 tablespoons heavy cream
- 1/2 teaspoon sea salt (optional addition to caramel)
- milk chocolate to drizzle
DIRECTIONS
- In a large bowl, combine flour, cocoa, and salt; set aside. In the bowl of a stand mixer fitted with the paddle attachment beat butter and sugar on medium-high speed until fluffy, about 2 minutes. Add egg yolk, milk, and vanilla and mix until incorporated. Reduce speed to low and add flour mixture until just combined. Wrap dough in plastic wrap and place in the refrigerator until firm, at least 1 hour.
- Adjust oven rack to upper-middle and lower-middle positions and heat oven to 350 degrees F. Line 2 baking sheets with parchment paper.
- In a small bowl, whisk 2 egg white until frothy. In a shallow bowl, place pecans for rolling. Roll a heaping tablespoon of dough, dip in egg whites, then roll in pecans. Place balls 2 inches apart on prepared baking sheets. Repeat with the remaining dough
- Using a teaspoon measure spoon, make indentation in center of each ball. Bake until set, 10 to12 minutes, rotating sheets halfway through baking.
- While cookies are baking, microwave caramels and heavy cream in medium bowl, stirring occasionally, until smooth, 1 to 2 minutes; set aside.
- Once cookies are removed from oven, gently press existing indentations with teaspoon measure. Fill each indentation with 1/2 teaspoon caramel mixture. Cool 5 minutes, then transfer to wire rack and cool completely.