Showing posts with label cookie. Show all posts

Sunday, February 10, 2013

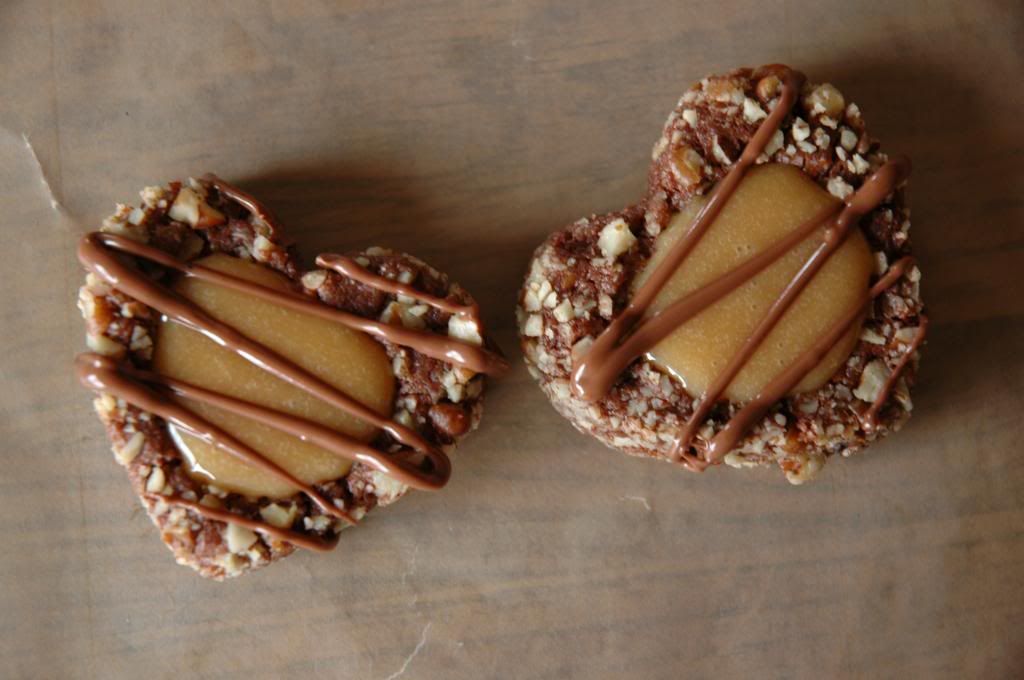
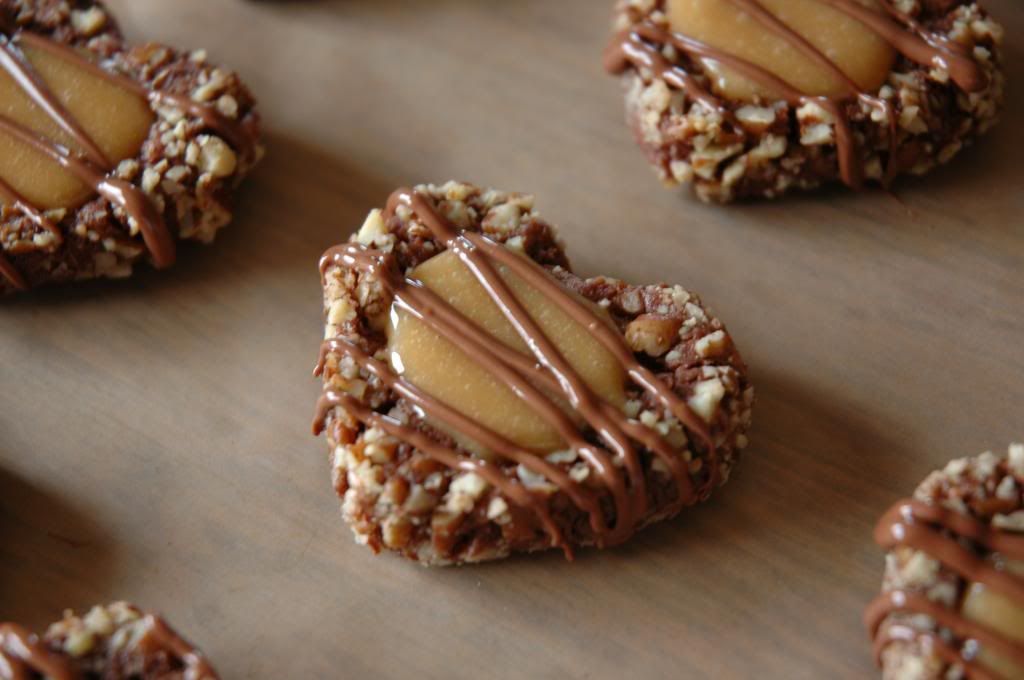
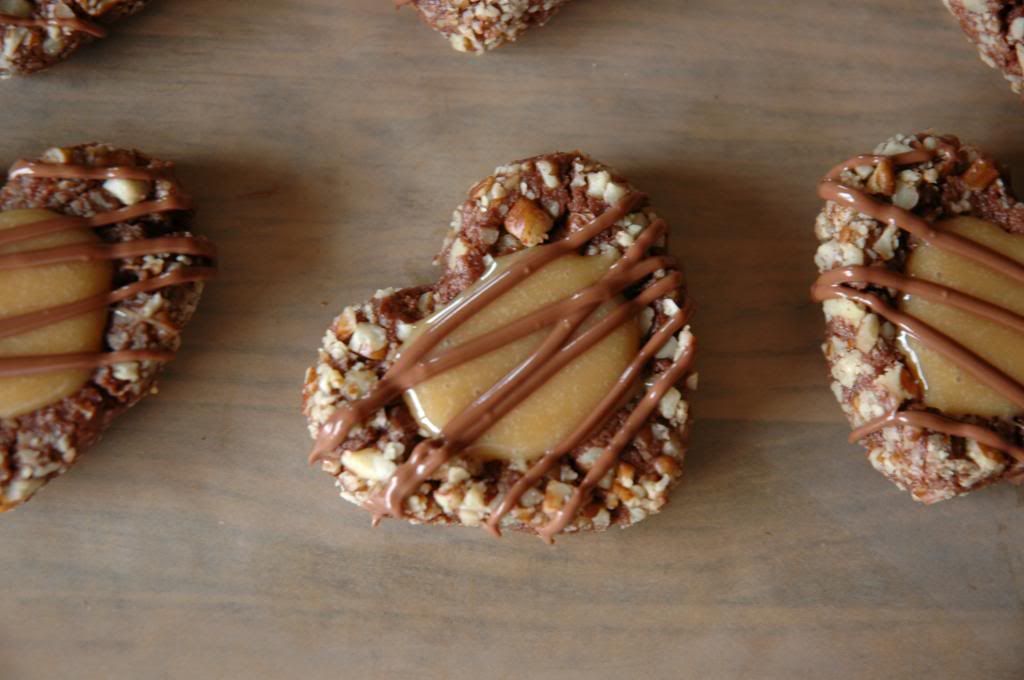
Salted Caramel Turtle Heart Cookies

Pin It
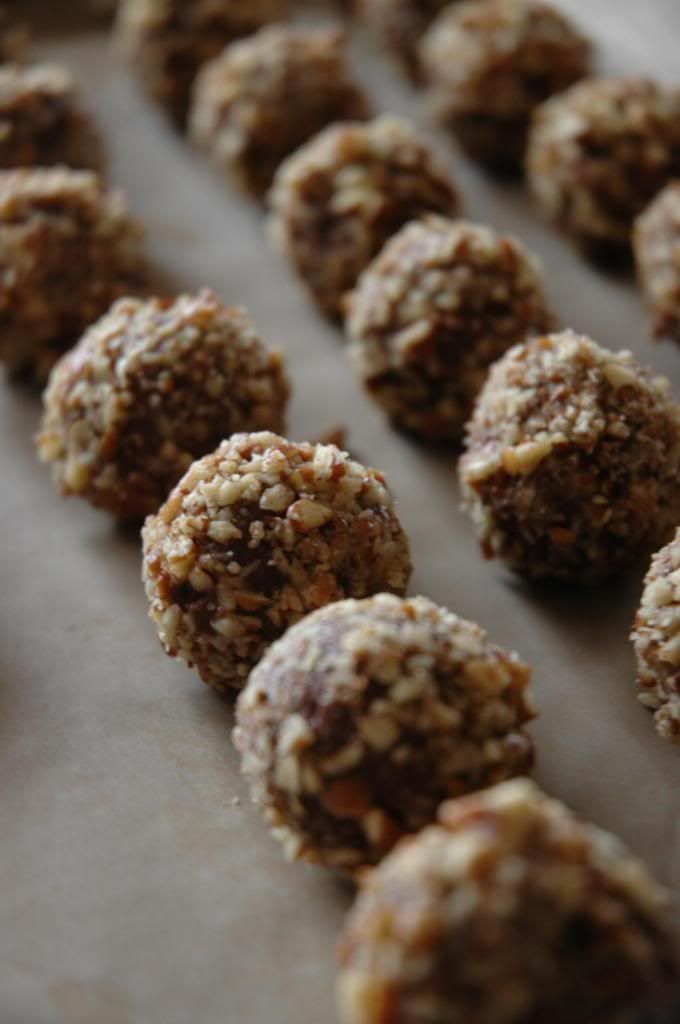
You know, I initially wanted to make turtle cookies that looked like the actual animal. I had it all envisioned -- a fat head and plump little flippers. Well given the time of the year and my shabby sculpting skills, heart shaped turtle cookies seemed like the better choice. Maybe my turtles will take form in icebox cookies later this year. Oh, which reminds me, Happy Lunar New Year! I hope those on the east coast got to celebrate!
To make these special, I added a bit of sea salt to the caramel mixture and drizzled milk chocolate on top to finish them off. The chocolate cookies are soft, the caramel gooey, and I have eaten too many already. Make these yourself and give them all away before you feel guilty after stuffing your face.

My tips for these cookies:
  1. Freeze the hearts before baking so they can better retain their shape. Pop them in the freezer for 30 or so minutes until firm. (I ended up just watching the latest Big Bang Theory episode. Oh Sheldon is just too funny.)
  2. Use more or less cream for the center depending on how gooey you want the caramel. If you use the full amount, the caramel will not set very well, so it would be difficult to pack these to give away.
  3. I ended up baking these for 18 minutes instead of the 12 minutes recommended. 
  4. Not to be OCD or anything, but if you want to obtain the full yield each dough ball should weigh around 15-16 grams before you add the pecans. 
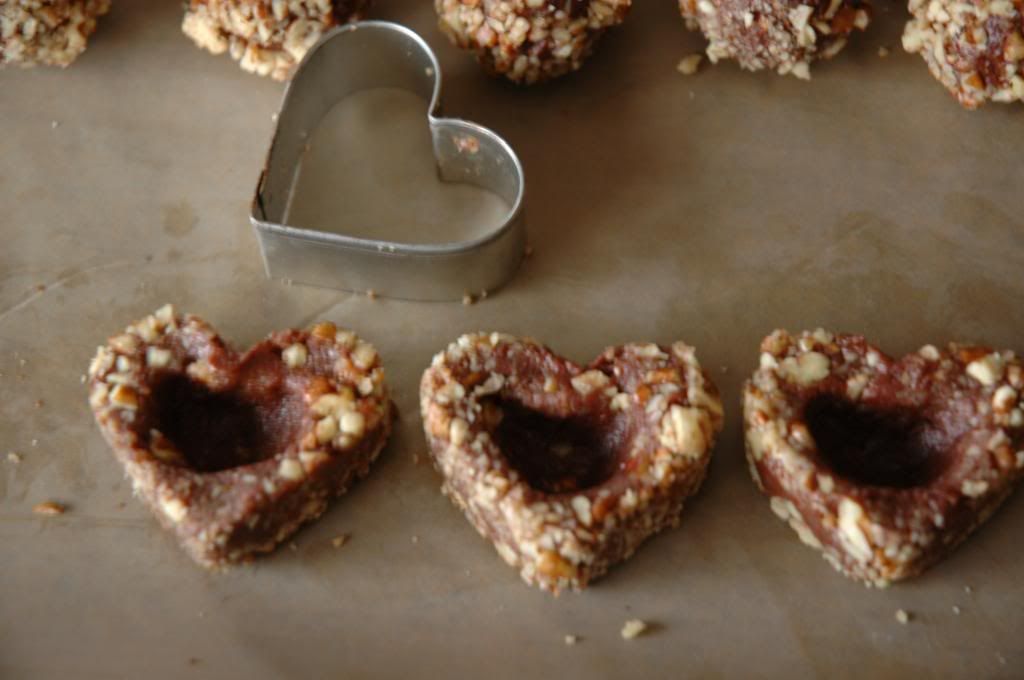
Here's a little tutorial!

(I resized these pictures to be smaller because they came out quite blurry. Sorry!!!)
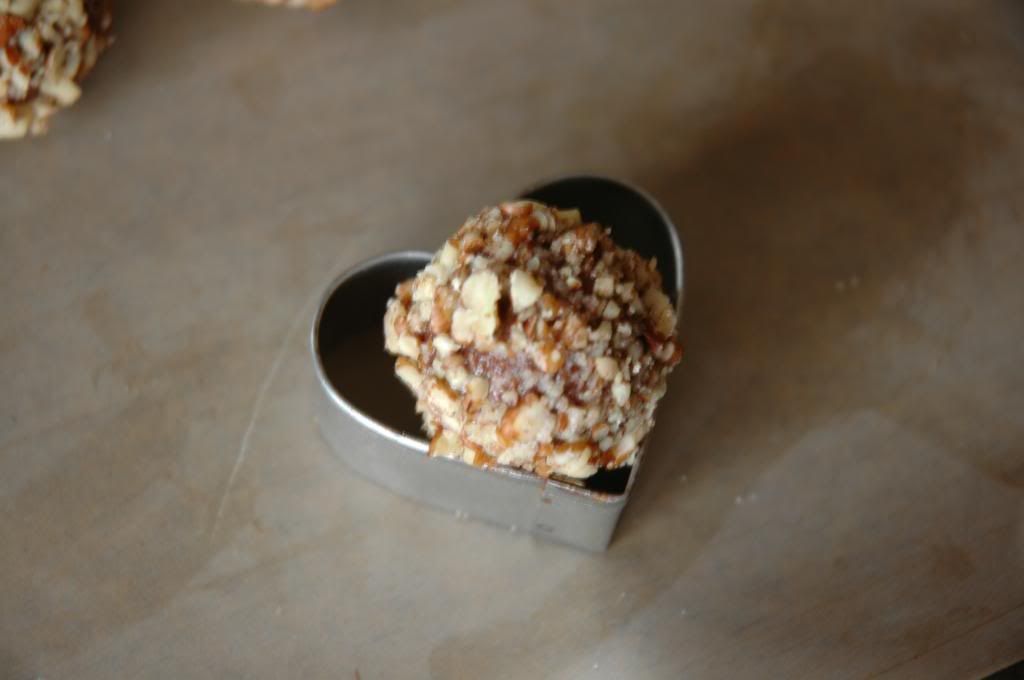

Roll out all the cookies and coat them in the chopped pecans.

Plop a cookie into the center of a small heart shaped cookie cutter.
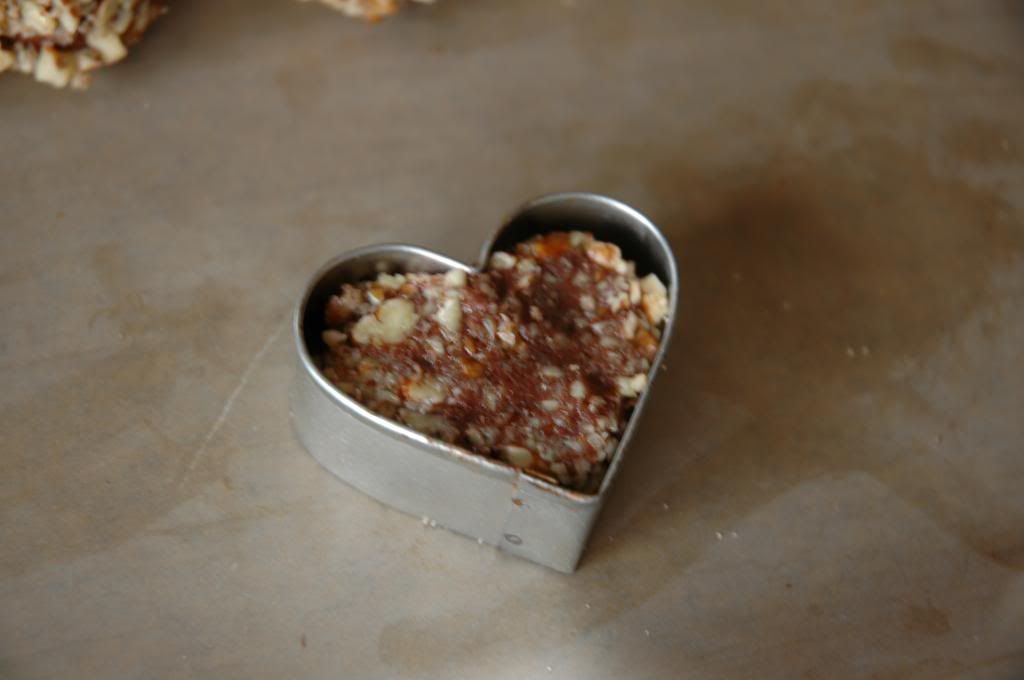


Gently press the dough into the shape of the cookie cutter.

Using a teaspoon, or your fingers, make an indentation in the center. Gently push the the heart out of the mold. 


Salted Caramel Turtle Heart Cookies

INGREDIENTS
From America's Test Kitchen
Yields 2.5 dozen cookies
  • 1 cup all-purpose flour
  • 1/3 cup cocoa powder
  • 1/4 teaspoon salt
  • 8 tablespoons (1 stick) butter, softened
  • 2/3 cup sugar
  • 1 large egg, separated, plus 1 egg white
  • 2 tablespoons milk
  • 1 teaspoon vanilla extract
  • 1 1/4 cups pecans, chopped fine
  • 14 soft caramel candies
  • 3 tablespoons heavy cream
  • 1/2 teaspoon sea salt (optional addition to caramel)
  • milk chocolate to drizzle
DIRECTIONS
  1. In a large bowl, combine flour, cocoa, and salt; set aside. In the bowl of a stand mixer fitted with the paddle attachment beat butter and sugar on medium-high speed until fluffy, about 2 minutes. Add egg yolk, milk, and vanilla and mix until incorporated. Reduce speed to low and add flour mixture until just combined. Wrap dough in plastic wrap and place in the refrigerator until firm, at least 1 hour.
  2. Adjust oven rack to upper-middle and lower-middle positions and heat oven to 350 degrees F. Line 2 baking sheets with parchment paper.
  3. In a small bowl, whisk 2 egg white until frothy. In a shallow bowl, place pecans for rolling. Roll a heaping tablespoon of dough, dip in egg whites, then roll in pecans. Place balls 2 inches apart on prepared baking sheets. Repeat with the remaining dough
  4. Using a teaspoon measure spoon, make indentation in center of each ball. Bake until set, 10 to12 minutes, rotating sheets halfway through baking.
  5. While cookies are baking, microwave caramels and heavy cream in medium bowl, stirring occasionally, until smooth, 1 to 2 minutes; set aside.
  6. Once cookies are removed from oven, gently press existing indentations with teaspoon measure. Fill each indentation with 1/2 teaspoon caramel mixture. Cool 5 minutes, then transfer to wire rack and cool completely.

Saturday, February 11, 2012

Momofuku Blueberry-and-Cream Cookie

Pin It
Let's get to the straight to the point.
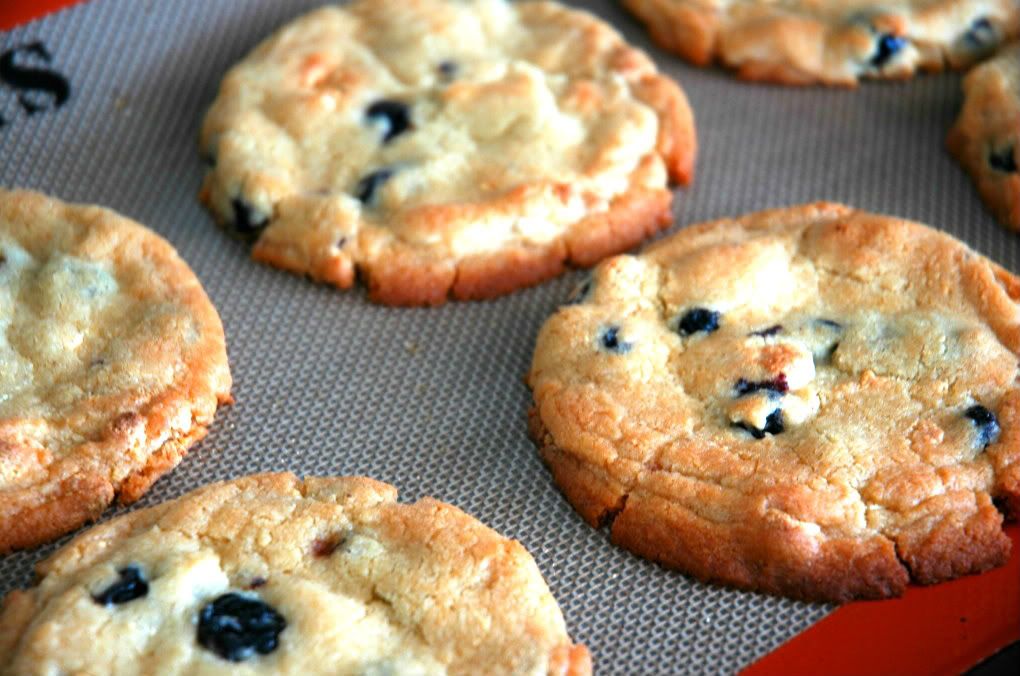
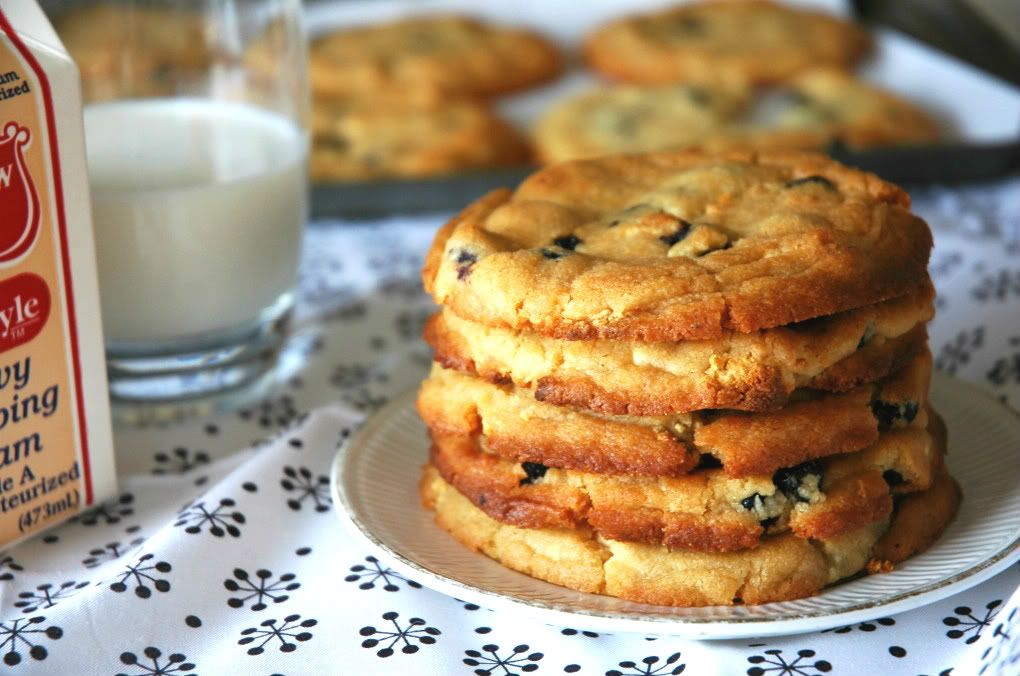
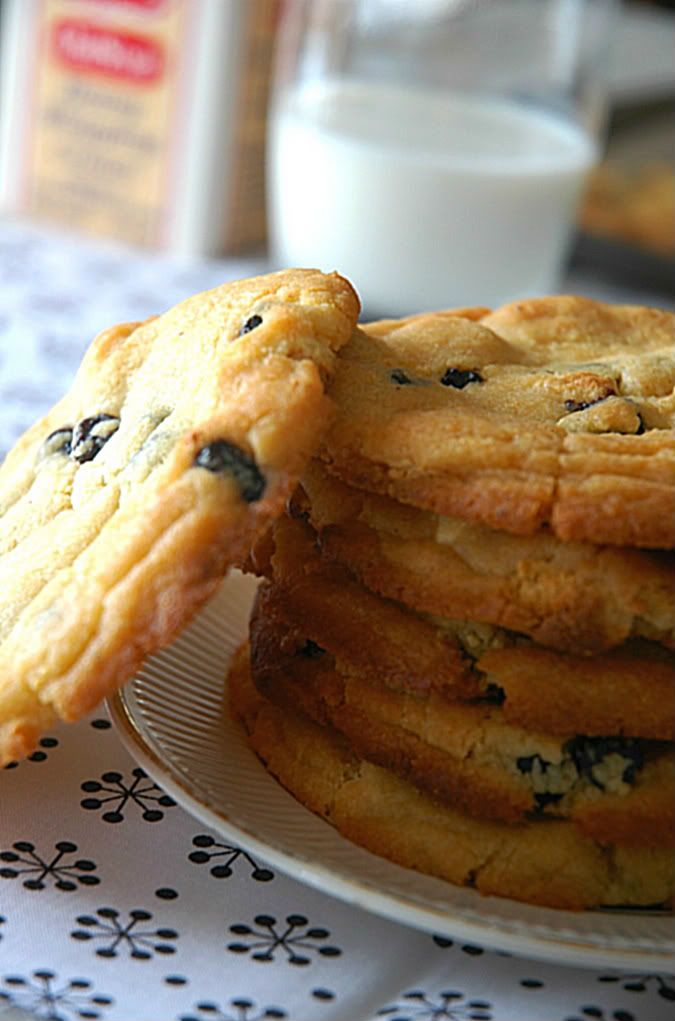
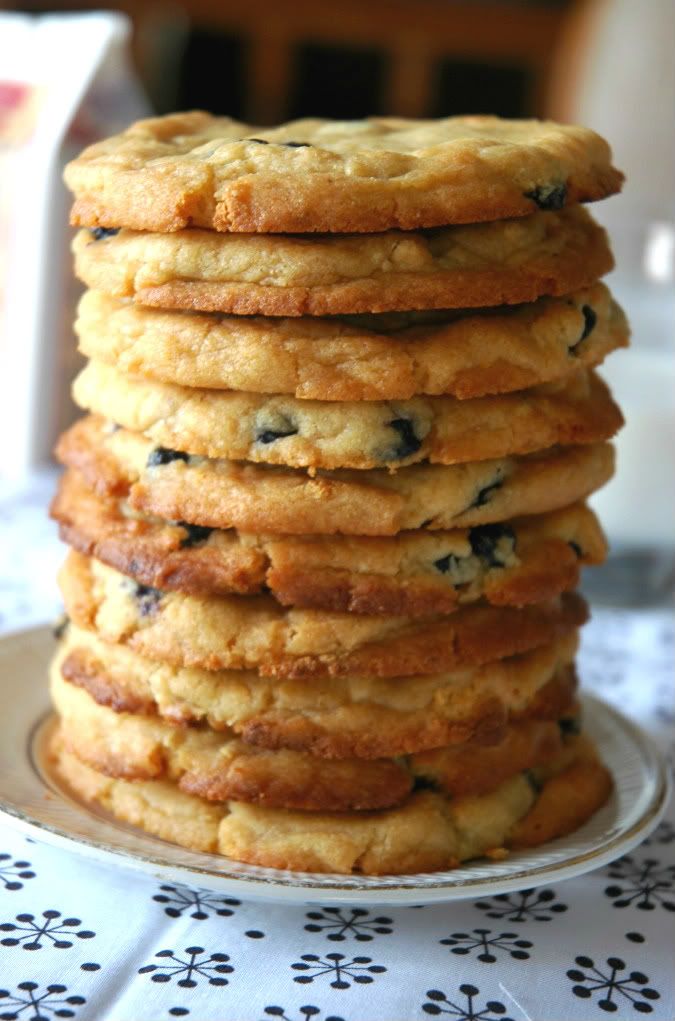
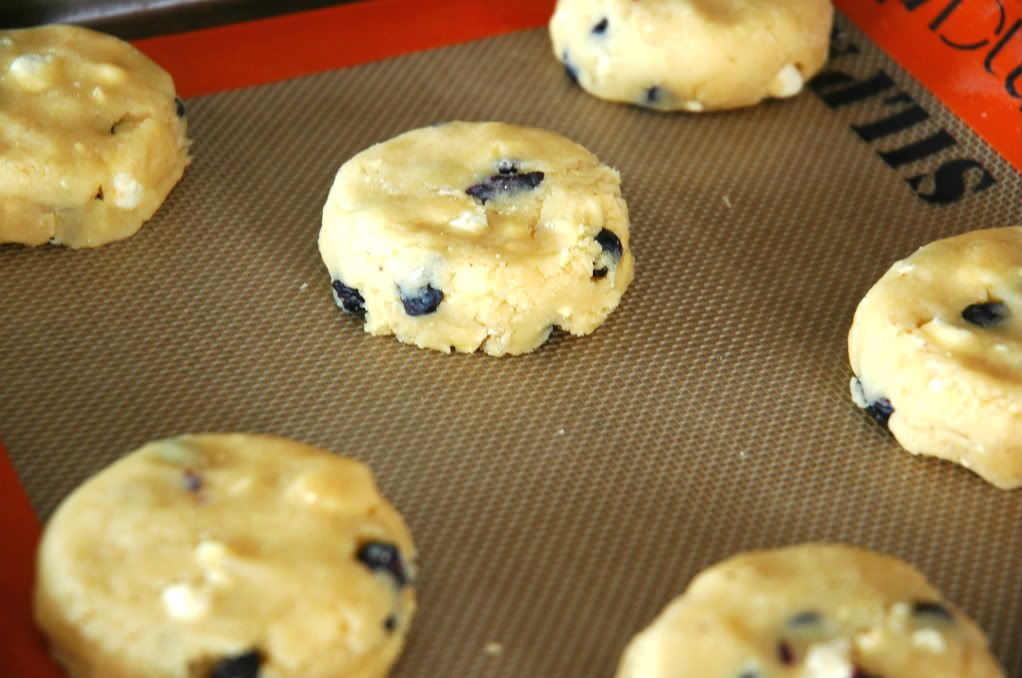
Blueberry and Cream Cookies. Heaven in one chewy, sugary, addicting, uplifting, life changing, (and on with the exaggerative adjectives) bite. These are a must make if you want to find a potential replacement for a chocolate chip cookie for the moment, or just want something different.
Though extremely odd for a teenager like me, I love roaming around Williams & Sonoma, Joannes, Hobby Lobby, and Bed, Bath & Beyond. I am always the youngest person there aside from the crying child in the stroller or the elementary schoolers running around at the risk of breaking something while their mother is contemplating the white colored plate set or SHOCK, the ivory colored plate set.... What to do, what to do.

Anyway, if any has tried out any of the samples of the Momofuku cookie mixes at Williams & Sonoma lately, they will understand why I was so eager to replicate these jewels. Not everyone lives in New York and can get their hands on the real stuff, but otherwise, we can fill our homes with the sweet, lingering aroma of these blueberry cookies. Tantalizing. 
They look super buttery here... which certainly isn't misleading
Glucose. Is that a common ingredient? I would like to assume that it is an ingredient most of us don't have on hand in our pantries at all times. When Target is your cooking supplies mega-mart, you are trotting out with some market pantry brand flour and sugar, not some grade A ingredients. This is why I was dumbfounded when I read glucose as one of the main sweeteners in this recipe. Then for some odd reason I began to run through the steps of glycolysis and the amount of ATP is produced etc. I am such a nerd. Anyways, I'm not quite sure if you can substitute other syrups such as corn syrup for the recipe because the glucose lends itself to the desirable chewiness. Then again, the glucose container I bought only states corn syrup under its ingredient list. Confusing, huh? If you want glucose, you can find a Wilton brand glucose at a craft store with a baking section. Coughing up $5 may be tough for some, but garner up your strength because these cookies are DELICIOUS!
My giant stack of cookies!
The recipe I posted below are from Martha Stewarts website. The volume of work is tedious, but the end product is worth it. My oven runs hot, so I ended up baking these for about 10 minutes instead of 15, so be sure to keep your eye on these as they bake. No one likes burnt cookies! In fact, I liked the taste of the cookies I under baked a tad bit more than the ones that were well done. 
Enjoy!

Momofuku Blueberry-and-Cream Cookies
Yields 1 dozen cookies

INGREDIENTS
  • 2 1/2 cups all-purpose flour
  • 1/4 teaspoon baking powder
  • 1/8 teaspoon baking soda
  • 2 teaspoons salt*
  • 1 cup unsalted butter
  • 1/2 cup plus 2 tablespoons white sugar
  • 1/2 cup plus 2 tablespoons light-brown sugar
  • 1/4 cup glucose
  • 1 large egg
  • 3/4 cup dried blueberries
  • 1/2 cup plus 1/3 cup Milk Crumbs
DIRECTIONS

  1. Line two baking sheets with parchment paper; set aside.
  2. In a large bowl, mix together flour, baking powder, baking soda, and salt; set aside. In the bowl of an electric mixer fitted with the paddle attachment mix together butter, sugars, and glucose until well combined. Add egg and mix until well combined.
  3. Add flour mixture and mix until well combined. Add blueberries and milk crumbs and mix until well combined. Using an ice cream scoop about 2 1/8 inches in diameter, scoop dough into balls and place about 2 inches apart on prepared baking sheets.
  4. Preheat oven to 375 degrees. Transfer baking sheets to refrigerator until dough is chilled, about 15 minutes. Transfer baking sheets to oven and bake, rotating pans halfway through baking, until cookies are golden brown and tops begin to crackle, about 15 minutes. Transfer cookies to a wire rack to cool.
Milk Crumbs

INGREDIENTS
  • 1/4 cup plus 1 tablespoon nonfat milk powder
  • 2 tablespoons all-purpose flour
  • 1 tablespoon cornstarch
  • 1 1/2 teaspoons sugar
  • 1/8 teaspoon salt
  • 1 1/2 tablespoons unsalted butter, melted
  • 1/4 cup white chocolate, melted
DIRECTIONS
  1. Preheat oven to 225 degrees. Line a baking sheet with parchment paper; set aside.
  2. In a medium bowl, whisk together 2 tablespoons plus 1 1/2 teaspoons milk powder, flour, cornstarch, sugar, and salt. Stir in melted butter until well combined. Spread mixture on prepared baking sheet and transfer to oven. Bake until dried and crumbly, 8 to 10 minutes. Remove milk crumble from oven and let cool completely.
  3. Transfer milk crumble to a large bowl and fold in remaining 2 tablespoons plus 1 1/2 teaspoons milk powder and white chocolate. Use immediately or transfer to an airtight container and keep refrigerated until ready to use.
NOTES:
* You may want to decrease this to 1 teaspoon. My cookies had too much of a salty background flavor for my liking when I followed this recipe exactly.

    Thursday, March 24, 2011

    Smiley Oreo!

    Pin It
    I've been craving oreos lately, but it seemed fitting to try to attempt to make my own. This then opened up the door to create cookies that would be absolutely adorable. Initially I wanted to imprint a design on the cookies that would be quite similar to the original nabisco cookie, but while walking through the aisles of the craftstore, nothing came close. There was something better, a smilely face stamp! It seemed like the perfect plan!

    While rolling these babies out my dad happened to walk by too, curious as to what I was slaving over that fine weekend afternoon. Peeking over my shoulder he began to chuckle and asked if we could actually eat them. I don't know what he was trying to imply with that remark, but before he went on his way he said they were funny and he wanted to eat right then and there.
    The cookies themselves were quite tasty, but to be honest they fail as a clone of that nostalgic cookie from our memories. The cream was on par while the cookies themselves weren't that deep, chocolately, almost bitter taste that I was seeking when I decided to experiement with this recipe that seemed to get rave reviews online. If I could I think that if I had added a bit more cocoa to the dry mixture it would have been better, yet even if they're were perfect, it's hard to resist those blue packages of oreo cookies that plead for you to buy them. I can get along with my life though because these little guys were a blast to whip up and the outcome, although not what I intended for them to be, are so cute that I could care less when I dip those smiling faces into my milk... and then bite their heads off. What a cynical idea now that I think about it.

    Honestly, there's also no need to post up this recipe. It basically cake mix. Just type in "oreo cookie clone" into youtube and it'll be within the first couple video results.

    Enjoy!

    Hmmm, they kind of look like dog biscuits in this lighting...

    Saturday, March 5, 2011

    Panera Inspired Chocolate Mint Crinkles

    Pin It
    I went to Panera Bread last week and aside from my usual entré that i get every single time, aka the frontega chicken with broccoli cheddar soup, I had the opportunity to split their chocolate mint crinkle with my sister. Yes, I lack variety in my life. Once you've found that one menu item it's hard to deviate away from it, am I right? Anyway, it was DELICIOUS! So fudgy, chocolaty, minty, and just the perfect way to end my meal. Now I know it's really sad that I couldn't stop thinking about these cookies and that I became possessed to try to clone these treats at home, but I must say I did a decent job. Just enough mint flavor. The hardest part about making these cookies is basically waiting for the dough to chill before you can shove those babies into the oven! Try the recipe out!
    I'm also content and mildly satisfied with how the pictures developed. It's been ages since I had made contact with my dad's Nikon camera. The quality is beyond that of my phone that I can't even fathom why I neglected this camera for so long. Then again the soreness in my arm might be the result from holding it up. I don't understand why it's so heavy!? My arm started to cramp while trying to focus the lens for a particular shot. Pathetic. Oh well, cookies make every form of pain go away whether it be emotional or physical so I shall go secretly munch on some right now.
    Did I ever tell you guys how much I love my dad's English? He tends to mock the colloquial language I use like epic fail, shiz bombs, oh-la-my-goodness-ah!..etc. The word delicious-ah is also excessively exhausted in my daily conversations. I rarely swear so wipe that smirk off your face and don't laugh at my weird phrases. Back to the story, the family was talking about one of my sisters during dinner and I was saying she epically failed at whatever we were talking about because it's all so vague in comparison to what followed in the conversation.  He replies with, "Oh yes, she fail, " then goes on to eat a cookie and says, "Delicious-ah!" So funny. Maybe you had to be there. Wish I had a camera to record that moment...

    Enjoy!

    Dark Chocolate Mint Crinkles
    Adapted from bakersroyale
    Yields 1 dozen cookies

    INGREDIENTS
    • 3/4 cup plus 1 tablespoons all-purpose flour
    • 3/4 teaspoons baking powder
    • 1/4 teaspoon salt
    • 4 ounces dark chocolate, finely chopped
    • 1 1/4 cups sugar
    • 2 tablespoons olive oil*
    • 1 1/2 tablespoons unsalted butter, melted and warm
    • 1 tablespoon light corn syrup
    • 1 large egg
    • 1 teaspoon vanilla extract
    • 11/4 teaspoon peppermint extract
    • 1/3 cup semi-sweet chocolate chips, lightly coated in flour
    • 1/2 cup powdered sugar
    INSTRUCTIONS
    1. Sift together the flour, baking powder, salt and then set aside.
    2. Heat chocolate in either the microwave or a double boiler until melted being careful not to scorch it.
    3. In a mixer on medium speed, beat together the sugar, oil, butter and corn syrup until well incorporated. Beat in the egg, vanilla and peppermint extract.
    4. Turn the mixer down to low speed and beat in the melted chocolate followed by gradually adding in the flour mixture until mixed in completely, but do not over beat. Lastly add in the chocolate chips. Wrap the dough in plastic wrap and refrigerate for about one hour or until firm.
    5. Preheat the oven to 325°F. Line a baking tray with parchment paper. Take the dough out from the refrigerator and form 2 inch balls, more or less depending on how large you want your cookies to be.
    6. TIP: Use a small ice cream scoop to obtain uniformly sized cookies.
    7. After shaping the dough, roll the balls heavily in the confectioner's sugar.
    8. Arrange the cookies 2 inches apart on the baking sheet because they expand quite a bit while baking. Bake for 12-14 minutes for a crisp texture or 10-12 for a chewier end product depending on your oven of course.
    9. Let the cookies cool and enjoy! Be sure to store these in an air tight container to keep the desired texture.
    NOTES:

    *I used olive oil because I didn't have any vegetable oil on hand, however just use whatever oil that you have in your pantry.
    Do not leave these out in the open for too long. I left mine unwrapped overnight and I woke up to hard cookies. Sad day.

    Monday, February 28, 2011

    HELLO!

    Pin It Welcome to Rummy Tum-Tum! Catchy isn't it? Well, it's actually derived from a hilarious line from a Target commercial I stumbled upon this past winter. Don't we all recall that crazy (that might be an understatement, so deranged perhaps) Target lady who trains for the after Christmas sale by literally becoming a shopping Olympian? Just watch the clip below to understand.
    Anyway, through this blog I intend to share my passion for baking and hopefully inspire some to embark on that treacherous journey to the kitchen. I am certainly no pastry chef, but the satisfaction I attain from popping a batch of cookies into the oven is certainly an incentive to bake. My inspiration? Hmmm, now that I contemplate it I don't really know what ignited my start with baking. I can tell you though that it was kicked into hyper-drive when both of my sisters left for college and I was left alone with my parents. I had to find some way to fill in the void or else I probably would have gone insane from boredom. I'm actually surprised my family isn't obese yet considering the volume of baked goods that are produced.

    I also warn you I am quite the experimenter. Baking is supposed to be fun and simple so by mingling around with the ingredients I have on hand I'm able to keep it that way. That's pretty much the excuse I've concocted that can explain and justify why going to the store to buy the proper ingredients is so strenuous and problematic for someone like myself. It seems like a hassle when I don't want to change out of my toothpaste stained pajamas or drive those daunting five blocks. I'm just that lazy.

    Hopefully I can update every week with pictures. I will post whatever I bake so check often! I'll probably throw in some random bits about my personal life too when I either feel like ranting or something so interesting occurs that I feel compelled to write about it to the internet. With each new post there'll be more insight and something new to learn about me. This blog is in addition another means for me to procrastinate on studying and other things that I could be completing in a timely matter.
    Just a reminder, I bake in small quantities, so my measurements may look odd. I usually make only one dozen or half a dozen of something. It's just the way I roll. Just relax and enjoy the pictures and recipes...
    Related Posts Plugin for WordPress, Blogger...
    Pin It button on image hover