Sunday, February 26, 2012

Bleeding Tarts and the Hopeless Chef

Pin It
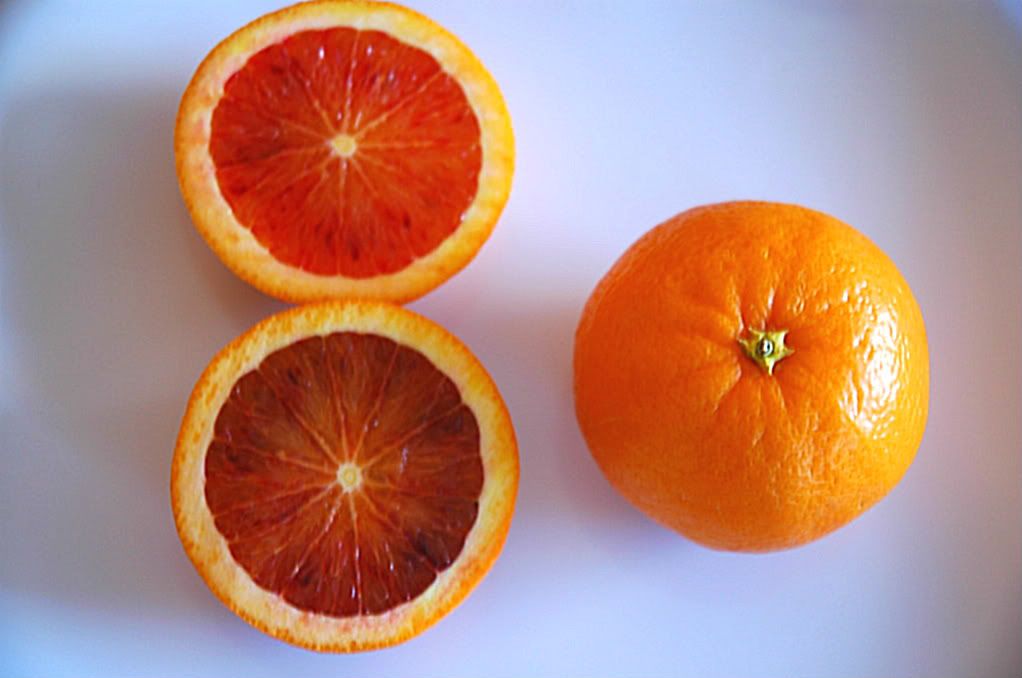
They're more alien looking to me than pomegranates. More extraterrestrial than dragon fruits, and more bizarre than mangosteens. It's a beautiful color, but at the same time unearthly in its deep, shirt staining quality. Yes, beware, the apron I was baking with now has a splotch of blood orange juice. Sadness. The tide-to-go I frantically grabbed didn't do anything but facilitate the spread of the juice on the fabric. Maybe I applied it wrong. Blood oranges simply put are scary looking to me. They do make cool looking desserts though!

Blood oranges are in season during the winter, and I was able to find these guys at Target surprisingly for $3.99 for a 3 pound bag. My local farmers market didn't carry any, nor did the Whole Foods down the street. Out of all my grocery stores that I have access to, I put Target at the bottom of the list for the likelihood of finding blood oranges. More points in my book for Target since they carried these for a decent price! I wonder if Walmart has blood oranges in stock as well. I was about to go after school, but that would be procrastination to the extreme, even if two of my exams are delayed until next week.
I love my older sisters. They spoil me to death, and I can mess around with them as if they were my younger siblings. My oldest sister, however, is a complete disaster in the kitchen. I should just ban her. That's a dangerous place to put someone who is down right clueless. We made some stir-fried noodles for lunch, and I have a heartfelt message for her. Sister, you have to boil the water before you dump in the noodles. Oh right, you also have to cook the noodles before you can eat them. Enough said. I will commend her for her impeccable mastery of the art of scrambled eggs though. She's got that down to a science!
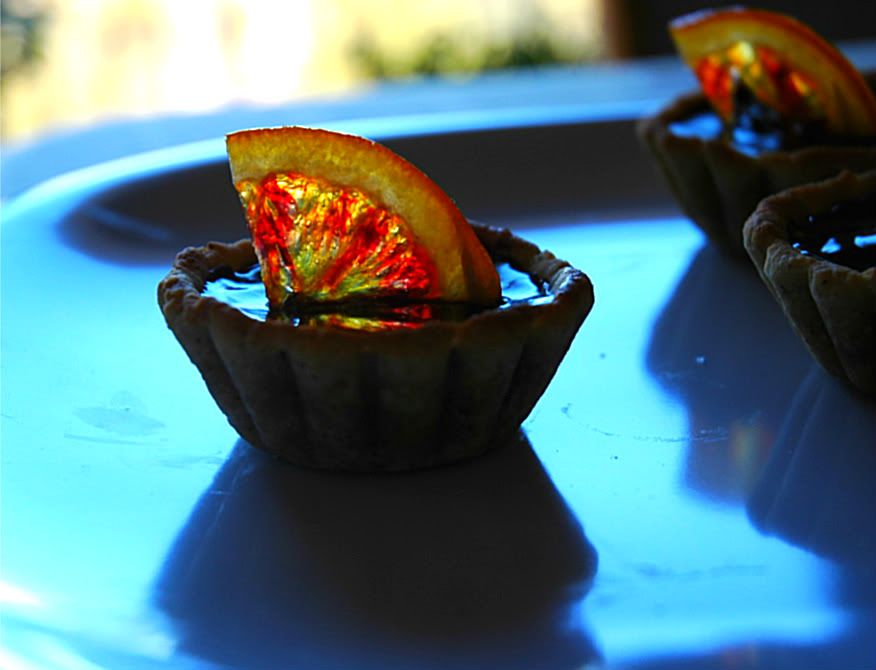
Hate the lighting of the rest of the picture, but the orange slice looked so pretty.
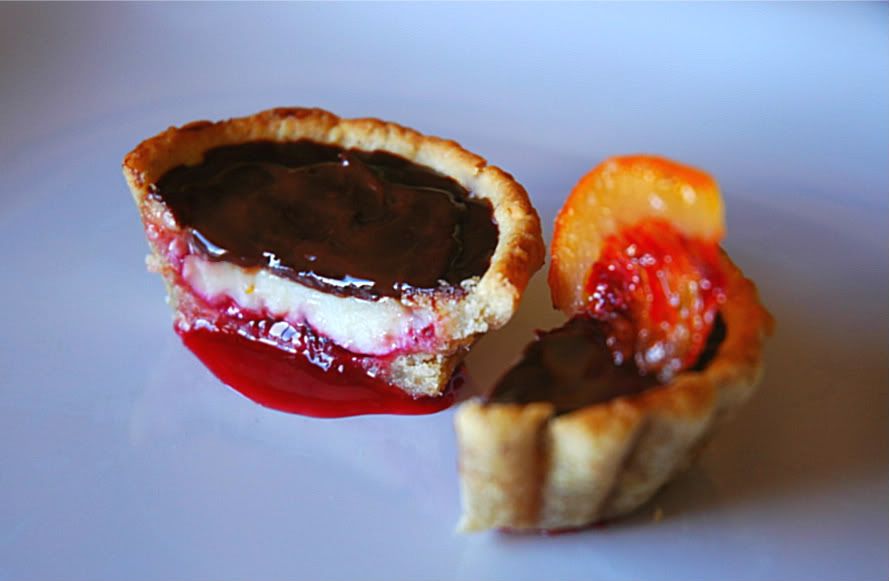
This recipe is pretty simple in my opinion because there's no special technique when combining the ingredients. I had a vision of a liquid center oozing out of the tart when you bit into it, but it took me a while to figure out how to execute it. I ended up freezing the syrup in my mini cupcake tins lined with plastic wrap. Silicon molds would have been a luxury, but I made do. The only thing I would foresee any compilations is knowing when the custard is thoroughly cooked, but not overdone so that it is no longer creamy. The surface shouldn't brown at all, both for aesthetic and textural reasons. When you take these out of the oven they will jiggle a lot, but when they are chilled, the filling sets up into a firm, smooth, luscious custard. It's also a plus that the amount of ingredients is pretty minimal and simplistic when evaluating the number of components that went into these tarts. The only things I really needed to buy were the oranges and chocolate. Talk about a breeze! They tasted pretty good, I liked how the liquid center was slightly bitter to compete with the very sweet custard. I may make a variation of these with a cheesecake custard and possibly a chocolate center.
The rundown:
a hazelnut crust, an oozing blood orange center, a blood orange custard, and a dark chocolate ganache
Enjoy!
HAZELNUT CRUST
Preheat oven to 325 degrees Fahrenheit
INGREDIENTS
  • 1/4 cup toasted hazelnuts
  • 3/4 cup all purpose flour
  • 2 tablespoons sugar
  • pinch of salt
  • 70 grams chilled unsalted butter, cut into cubes
  • 1 egg yolk
  • ice water
DIRECTIONS
  1. Lightly grease your tart shells. Using a food processor, pulse the hazelnuts until finely ground. Add in the flour, sugar and salt and pulse until mixed.
  2. Add in the butter and process until the mixture is sandy in texture. Add in the egg yolk and process, adding in a little ice water until a dough forms. 
  3. Section the dough into 25 gram balls and then mold into the tart shells. 
  4. Place into the refrigerator for 30 minutes. Bake the shells for 10 minutes, or until slightly golden.
BLOOD ORANGE CENTER
INGREDIENTS
  • 1/2 cup blood orange juice
  • 2 tablespoons sugar
  • 1 tablespoon corn syrup
  • pinch of salt
DIRECTIONS
  1. Place all the ingredients in a small sauce pan over medium heat. Cook until a thick syrup coats the back of the spoon. For reference, the mixture should be similar to that syrup that oozes out of cordial cherries. The reduced mixture should measure out to be 1/3 cup.
  2. Pour into molds, such as mini cupcake tins, small enough to fit into your tart shells, and freeze until solid.
BLOOD ORANGE CUSTARD
INGREDIENTS
  • 1 can sweetened condensed milk
  • 1/4 cup sour cream
  • 3/8 cup blood orange juice
  • 2 teaspoons blood orange zest
DIRECTIONS
Preheat oven to 325 degrees Fahrenheit
  1. Put all the ingredients in a medium sized bowl and whisk until just combined.
  2. Place a frozen cube of orange syrup in the center of each of the tart shells, and pour the custard on top, filling it up close to the rim. Bake for 10 minutes or until the mixture bubbles. Chill thoroughly. 
DARK CHOCOLATE GANACHE
INGREDIENTS
  • 4 oz. good quality dark chocolate
  • 6 oz. heavy cream
DIRECTIONS
  1. Put both ingredients into a microwave safe bowl, and heat until the chocolate melts, and mixes into a smooth ganache. Alternatively you could do this the traditional way and heat up some cream and pour it over finely grated chocolate. You may also add either corn syrup or a few pats of cold butter to get a nice shine.
  2. Spoon roughly 1 teaspoon of ganache on top of each tart shell, swirling and tapping until it settles into a smooth surface. Allow to cool and set before serving. Garnish with a candied orange peel or chocolate decorations. 

Sunday, February 19, 2012

Matcha Lychee Mousse Cake

Pin It
The lychees kind of look like they're glowing here:P
So far I have been able to waste two days of my four day weekend. I never realized that President's Day was such a big deal that I would practically be given an entire week off. I honor and commemorate the leaders of our nation, and I do so with cake of course! How else do you show your respect?

You of course could be like a student from my school and show your pride in other ways. One of our clubs went to the White House for a tour and was greeted by the first lady, Michelle Obama. He went insane! He probably would have shook her hand off and premanently freeze his face into that giddy smile he had for about 5 minutes. He was one excited little boy. I would have probably just peed my pants if I saw Michelle Obama in front of me. That woman is BEAUTIFUL! Plus she dresses so well.
This weekend will be utilized to catch up on some sleep as that is the prime topic of my agenda. Once I plopped onto my bed Friday night, I was knocked out cold for ten hours. Waking up under my toasty fleece blanket with the sunlight peeking through my window curtains was divine. Then to start my day I had some tasty rice porridge (aka congee) that my dad made. Which reminds me that I must start collecting family recipes so that I can cook them when I get older. I'm sure I could look some up online, however, some of my favorite foods are my dad's odd concoctions. It's experimentation at its best. I can assert with confidence that pickles were not easily available to my dad when he was growing up in Asia, and yet he loves to make pickle soup to eat with rice. So dorky.
Haha, I ended up using an ice cream scoop to make one of my chocolate decorations. Using my resources!!!
I must have been completely detached from the world for the past couple of weeks. I had no idea the Fray released a new album. It's nice to hear some hearty music instead of that auto tune puke on the radio. I must download this album from iTunes this weekend so I can jam out to it on my way to school. I'm sorry Drake, Flo Rida, and Lil Wayne, but there is a certain point where repeating the same word over and over to a droning beat gets a little annoying, and a little funny. Maybe they do that so it's easier to remember all the lyrics when they go on tour? I do not know. I still listen to their songs though because they're catchy and it makes me feel like a teenager! This week I was rapping with Flo Rida on the radio at a red light, and then that awkward moment when you see the person in their car in the next lane just staring at you or cracking up happened to me. Longest moment to wait for the light to turn green so I could speed away!
This week I made this little guy, yeah it's only a 6-inch cake! To do a crumb coat before the green tea ganache, I wanted to used a whipped ganache that I had set aside. I put the stacked and filled layers of cake into the freezer, thinking that if it was extra firm, the whipped ganache would be easier to spread on top. WRONG! I started to coat the sides of the cake with the ganache and it froze immediately. The more I tried to salvage the cake and smooth out the ganache, the more the cake ripped and crumbled. In the end I ripped off the ganache, because it had firmed up so much that it peeled off in one strip. Gross. The remaining cake looked so mangled and destroyed to say the least. I ended up making a cooked flour frosting for the crumb coat. I'm actually quite surprised I had the will power to even make more frosting. Yet, once again, that failed. The butter separated from the sugar. It was curdled, lumpy, and simply putrid looking. Like I said in another post, frosting just hates me. At this point I was sincerely contemplating going to the store to buy some good ole betty crocker frosting, but couldn't succumb to that! Trudging through, I made more white chocolate ganache and spread it on top of my room temperature cake. I must take note of this catastrophe for future reference. Goodness.
I should really invest in a nice platter for my cakes eventually. The toaster oven tray just isn't cutting it anymore!
So now I present to you the fruits of my labor. The rundown:
a matcha chiffon, a lychee mousse, doused in a matcha white chocolate ganache, and decorated with chocolate and lychee. Below I have posted the chiffon and mousse recipes, and you can play around with a white chocolate ganache recipe from around the web, because I kept pouring cream and adding chocolate to my ganache until I saw what I desired. I added about 1 teaspoon of matcha to one cup of ganache for the outer layer with a squirt of corn syrup for a nice shine and sheen.
Enjoy!
MATCHA CHIFFON
Adapted from the Gildedfork
Yields 1 18X14 inch jelly roll pan
INGREDIENTS
  • 1 1/3 cup cake flour
  • 1 tablespoon matcha powder
  • 1 1/2 teaspoons baking powder
  • 1 pinch of salt
  • 1/3 cup sugar
  • 2 egg yolks
  • 1/4 cup + 2 tablespoons cold water
  • 1/4 cup vegetable oil
  • 1/4 teaspoon vanilla
  • 3 egg whites
  • 1/4 cup sugar
DIRECTIONS
Preheat oven to 350 degrees Fahrenheit
  1. Sift together the flour, match, baking powder, and salt. Stir in the 1/3 cup of sugar.
  2. Whisk together the egg yolks, water, oil, and vanilla. Pour and whisk into the dry ingredients until well combined.
  3. Beat the egg whites on medium speed of a mixer until frothy and foamy. From this point on, gradually add in the 1/4 cup of sugar. Turn the speed up to medium high to high speed until stiff peaks have formed. 
  4. Take a little less than 1/3 of the egg whites and stir into the wet mixture to loosen it up. Fold in the rest of the egg whites in two additions until the batter is just combined. Pour into a parchment paper line jelly roll pan and bake for 15 minutes or until barely golden. 
LYCHEE MOUSSE
INGREDIENTS
  • 2 cans of lychees in syrup*
  • 1/4 oz gelatin
  • 1 cup heavy cream
DIRECTIONS
  1. Put the lychees from the two cans, and the syrup from one can into a blender. Be sure to reserve 4-5 for garnish. Pulse a few times until the lychees form a puree.
  2. Sprinkle the gelatin onto 2 oz of some of the remaining lychee can syrup. Using a microwave or a stove top, cook until the gelatin is dissolved. Mix into the lychee puree and refrigerate until set.
  3. Whip the heavy cream until soft peaks form. Whisk in the lychee mixture to complete the mousse.
ASSEMBLY:
  1. Using a circular cardboard cutout, carve out three circles from the chiffon in the jelly pan. Piece and fit together the scraps to form the fourth cake layer.
  2. Using a circular cake mold, place the first layer of chiffon down. Pour on some mousse, and then pop into the freezer for 5 minutes. Repeat this process until you reach the fourth cake layer, which you will not put mousse on top. Put the cake into the refrigerator for roughly 3 hours to set the mousse.
  3. Take the cake out of the mold and frost a crumb coat with some white chocolate ganache. Place into the freezer for 5 minutes. Once you take it out, pour on the green tea ganache, allowing it drip and completely coat the cake. Garnish with the lychees and any chocolate decorations. 
NOTES:
* Lychee is a really delicate flavor, and quite difficult to concentrate. If you can find some sort of lychee extract or liquor, you may consider adding that to the mousse to amp up the lychee taste. Even with all the lychee syrup I used, I was still hoping for a more distinct flavor. 

Saturday, February 11, 2012

♥Valentine's Day♥

Pin It
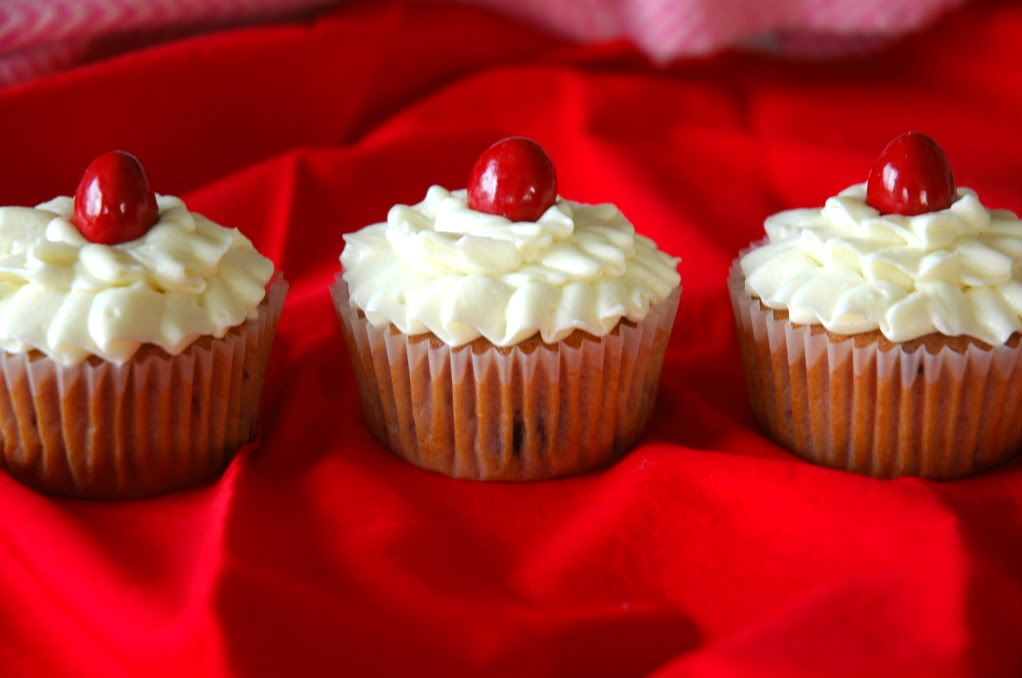
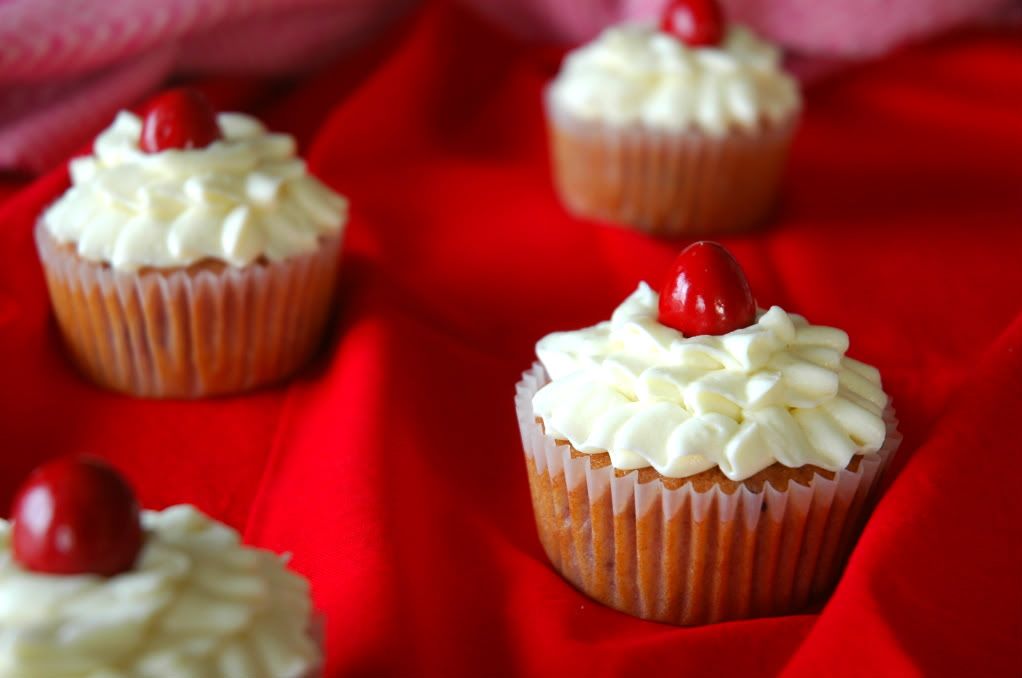
Remember handing out your valentines to your classmates in elementary school? If I could go back, I would pass out these cupcakes instead of those candy hearts with the printed messages like "I luv u" or "Be mine". Admit it, they are kind of gross unless they are the sweet tart flavored ones. Otherwise they're chalky and crumble in your mouth, but not in the good way.
I'm not too big on the Valentine's Day craze. However, I enjoy reading the hallmark cards at the grocery story while I smirk and cringe at the same time. Who comes up with the stuff that is written on these cards!? Romantic? No. Cute? Ehhh, depends. Hilarious? Yup. I won't be the love killer, so here's one of my new favorite songs and it fits the Valentine's Day feeling... sort of. It depends on what context you put the lyrics in. Haha, you'll understand once you watch the video. My sister introduced me to Ed Sheeran, and I'm glad she did. I love acoustics, and if you're a fan of Ron Weasley (Rupert Grint) from Harry Potter, watch this cute video! It will give you a little chuckle:)
I wanted to post these cupcakes before the holiday rolled around, so I ended up making my Momofuku Blueberry cookies this weekend as well. Check those out here! Too many dishes, copious amounts of butter, and excessive quality control tasting. I am a baker who tastes the batter throughout the entire process to ensure I didn't do anything wrong. I also have the tendency to taste each separate ingredient along the way. I'm just so curious as to what they taste like alone. From my experience, melted butter and bittersweet chocolate has made my tongue shrivel in disgust, a drop of vanilla extract made me tear up because it was so bitter, peppermint extract does not equate to the wintery fresh feeling of toothpaste, and lemon zest, well that was just a bad, bad idea. I guess sugar makes everything better! I've also noticed that I never produce the volume of goods a certain recipe yields.  I just need to stop spoon licking now don't I?
Enjoy!
Dark Cherry Cupcakes
Yields ~15 cupcakes

INGREDIENTS
  • 1 1/3 cups all-purpose flour
  • 1 1/2 teaspoons baking powder 
  • small pinch of salt
  • 1/2 cup butter (1 stick), room temperature
  • 3/4 cup + 2 tablespoons sugar
  • 2 eggs
  • 1/2 cup buttermilk
  • 1/2 teaspoon vanilla
  • 10 oz frozen, pitted, dark cherries*
DIRECTIONS

Preheat oven to 350 degrees Fahrenheit
  1. Places the frozen cherries into a bowl and microwave on high for 3 minutes. They should be defrosted, leaving you with a mixture of the cherries and their juices.* Once the cherries have reached this state, mashed them up a bit with a fork, and then let them cool while you proceed with the rest of the recipe. 
  2. Sift together the flour, baking powder, and salt. Set aside.
  3. Microwave buttermilk until slightly warm. Roughly 20 seconds. Stir in vanilla.
  4. In a large mixing bowl, beat the butter for 1 minute on medium high speed. Add in the sugar and continue to beat at the same speed until the mixture is fluffy. 
  5. Add in the eggs one at a time, waiting to add each consecutive one until the mixture is homogenous. Whip until fluffy.
  6. Now add the flour in three parts, alternating with the buttermilk and vanilla. Once all the dry ingredients have been moistened, add in the cherry mixture and beat until well combined. Fill the cupcake liners up 3/4 of the way. Bake for 15 minutes or until done.
Almond Frosting

INGREDIENTS
  • 2 tablespoons flour
  • 3/4 cup milk
  • 3/4 cup sugar
  • 3/4 cup butter (1 1/2 sticks)
  • 1/2 teaspoon almond extract
  • 1/4 teaspoon vanilla
  • 1 1/2 cups powdered sugar**
DIRECTIONS
  1. Cook the milk and the flour over medium heat until thick. Pour into another bowl and place parchment paper on top to prevent a skin from forming. Let it cool to room temperature.
  2. Beat the butter and sugar until fluffy. Beat in the flour mixture and beat on medium high speed until the frosting is fluffy and significantly lighter in color.
  3. Add in extracts, and beat in the powdered sugar. Use immediately.
NOTES:

* It should measure out to be roughly 1 1/2 cups of cherries, however I do advise weighing this ingredient! If you use maraschino cherries, you probably can use less than 10 oz to get enough flavor.
** The stiffer your frosting is, the sharper the ruffles will look. Add more or less powdered sugar to get your desired look.

DECORATING:

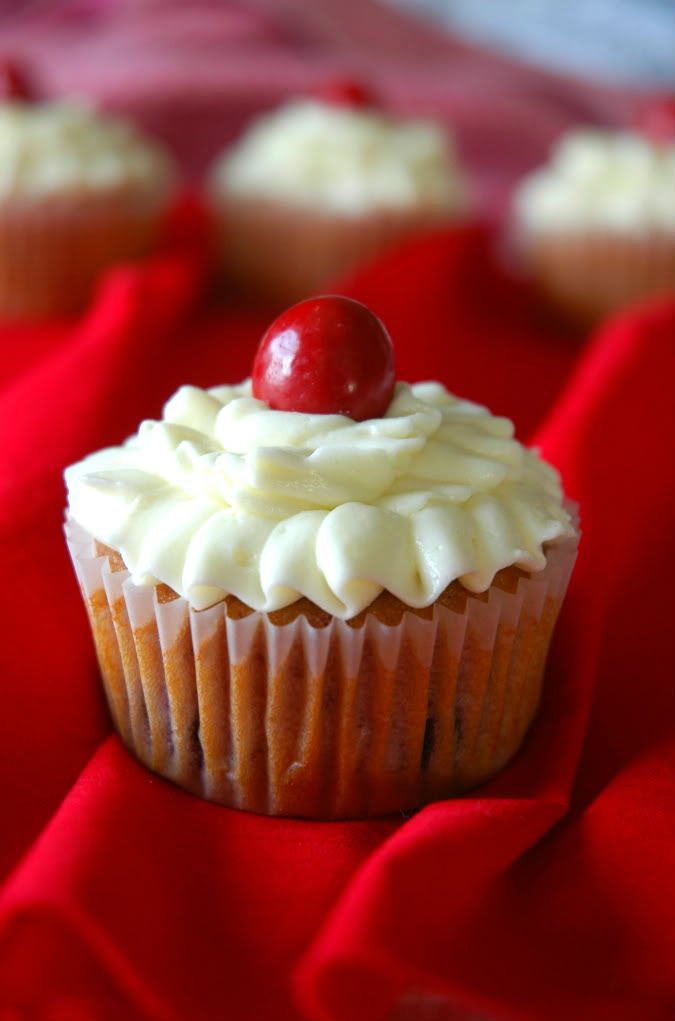
To get the ruffled effect, use a petal/teardrop shape tip (I used No. 104 from Wilton) and starting from the outside, pipe while wiggling the piping bag to get the ruffles. You will keep moving toward the center as if you're making concentric circles. Once you approach the center, piping the ruffles gets difficult, so no worries if it doesn't look as pretty as the other layers. You can top it off with a chocolate covered cherry or any other type of candy to cover up the shabby looking buttercream. It doubles as a decoration and built in photoshop.
Related Posts Plugin for WordPress, Blogger...
Pin It button on image hover