Monday, March 28, 2011

Baked with LOVE

Pin It
Ahh, what a beautiful pound cake. Drenched in a tangy lemon glaze, sealing in the most lucious and moist loaf I have ever made. 
Then WAPOW! Cut yourself a big slice and be surprised by the most darling heart baked right into the center!
Honestly, the most requested flavor in my family has got to be lemon, and I cannot argue with the love for the citrus fruit. The zest and juice brightens up every baked good and the rays of sunshine tingle your nose as they bake in the oven. Simple and straight forward, I love lemon. <3

In fact, I adore the tartness so much that it inclined me to make the scrumptious pound cake right after I got home from school. I had seen several blogs in which they used a Wilton cake pan that baked a perfect heart into the center of a round cake. You could then fill the center with mousse or jello or whatever fillings that tickled you taste buds. I unfortunately had no such convenience of this cake pan contraption and so I made do with a little innovation. I must conclude that my tactics proved to be successful.
After contemplating for a while on how to execute this pound cake it hit me. I whipped up the batter that took a mere fifteen minutes to pull together. I separated a little less than a third of the batter and added in about two drops of red food coloring. Since the batter itself is a little yellow the dyed batter transformed into the most vivid shade of coral! So pretty. I then spread the pink batter into my loaf pan and baked it off. After cooling in the freezer I took a simple heart shaped cookie cutter and stamped out the cake that would become the center of the loaf.
Simple enough. I poured half of the remaining batter into the loaf pan again and placed my heart cut outs standing up in a row similar to the first picture of this post. Then finally I poured the last of the tasty batter on top, smoothed everything out and popped that baby into the oven, crossing my fingers in hopes that my vision would be portrayed. No worries about the center being overcooked though. This cake is insanely moist, so I would assume that it would take some extreme heat and time before it ever became dry. 

Enjoy!

Lemon Love Pound Cake
Adapted form Allrecipes
Yields 2 loafs

INGREDIENTS
  • 1 cup butter,  softened
  • 3 cups sugar
  • 6 eggs
  • 5 tablespoons lemon juice
  • 1 tablespoon lemon zest
  • 1 teaspoon lemon extract
  • 3 cups all-purpose flour
  • 1/2 teaspoon baking soda
  • 1/4 teaspoon salt
  • 1 1/4 cups sour cream

INSTRUCTIONS
  1. In a large mixing bowl, cream butter and sugar until light and fluffy, about 5 minutes. Add eggs, one at a time, beating well after each addition. Stir in lemon juice, peel and extract. Combine the flour, baking soda and salt; add to the creamed mixture alternately with sour cream. Beat just until combined.
  2. Pour into a greased and floured 10-in. fluted tube pan. Bake at 350 degrees F for 55-60 minutes or until a toothpick inserted near the center comes out clean. Cool for 10 minutes before removing from pan to a wire rack to cool completely.

Lemon Glaze
Yields 1 cup

INGREDIENTS
  • 3 cups powdered sugar
  • 1/4 cup lemon juice
  • 1 teaspoon lemon zest
INSTRUCTIONS
  1. Combine the powdered sugar and zest in a mixing bowl.
  2. Slowly add the juice until it reaches the desired consistency for spreading or pouring over the cooled pound cake. 

Thursday, March 24, 2011

Smiley Oreo!

Pin It
I've been craving oreos lately, but it seemed fitting to try to attempt to make my own. This then opened up the door to create cookies that would be absolutely adorable. Initially I wanted to imprint a design on the cookies that would be quite similar to the original nabisco cookie, but while walking through the aisles of the craftstore, nothing came close. There was something better, a smilely face stamp! It seemed like the perfect plan!

While rolling these babies out my dad happened to walk by too, curious as to what I was slaving over that fine weekend afternoon. Peeking over my shoulder he began to chuckle and asked if we could actually eat them. I don't know what he was trying to imply with that remark, but before he went on his way he said they were funny and he wanted to eat right then and there.
The cookies themselves were quite tasty, but to be honest they fail as a clone of that nostalgic cookie from our memories. The cream was on par while the cookies themselves weren't that deep, chocolately, almost bitter taste that I was seeking when I decided to experiement with this recipe that seemed to get rave reviews online. If I could I think that if I had added a bit more cocoa to the dry mixture it would have been better, yet even if they're were perfect, it's hard to resist those blue packages of oreo cookies that plead for you to buy them. I can get along with my life though because these little guys were a blast to whip up and the outcome, although not what I intended for them to be, are so cute that I could care less when I dip those smiling faces into my milk... and then bite their heads off. What a cynical idea now that I think about it.

Honestly, there's also no need to post up this recipe. It basically cake mix. Just type in "oreo cookie clone" into youtube and it'll be within the first couple video results.

Enjoy!

Hmmm, they kind of look like dog biscuits in this lighting...

Monday, March 21, 2011

White Windmill Mocha Cake

Pin It
Coffee is one of my favorite flavors next to good ole vanilla. Together they're my match made in heaven! It's something about the sweet yet earthy aroma that entices my senses and don't forget the taste. My oldest sister made a mistake when she introduced me to Starbucks at the tender age of 12. At first I got those blended drinks like the strawberry or vanilla creme (which bascially taste like milkshakes), but eventually I met Mr. Caramel Frappiccino. Delicious! Then I met his aunt and uncle, Cinnamon Dolce and White Mocha Latte. Okay, now enough with personifying my Starbucks favorties. Let's get to the cake.
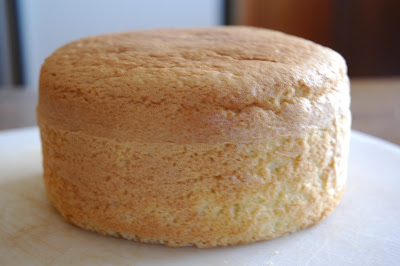
So fluffy! It didn't shrink either like my other sponge cakes. Yay!
I've always thought that vanilla bean specks in Bryer's ice cream just made it more appetizing, more so than that other kind, the blank canvas of barren white frozen wasteland of cream. You get the picture. Honestly I have no idea whether or not the flavor is amplified when you used the actual bean, but I thought it made a difference. It seemed as if it was more vanilla-y, more aromatic, more scrumptious. I could simply be deceiving myself to justify the extra step to extract the vanilla bean seeds though. My sister said the vanilla bean was very pungent, however I feel that I exclude that word when describing something tasty. Let's say the vanilla was pretty strong, which it should be considering how much I paid for a bottle of only TWO beans. $8. Are you kidding me right now?

White Windmill by the way is a cute Korean inspired bakery chain in Atlanta. I think the main reason the bakery appeals to me is the fact that their goods aren't overly sweetened and in a sense, simple. My favorite thing there has to be the peanut butter bun or the buttercream bun, whose name is literal. I feel like the filling is pure butter creamed until fluffy enough to be injected into the bread. Butter=LOVE.
Yum. A sea of buttercream... For some reason it gets darker after icing the cake and I have no idea why.
The bakery has this mocha cake with the tastiest mocha buttercream and moist cake. I haven't necessarily had the cake in a while so my memory is a little vague when it comes to the taste, but I know I loved it and I happen to love this cake that I concocted. It's also reminicent of the Andre's Bakery mocha cake down in the Cherry Creek District, but not as buttery. There was a lot of taste "testing" while making the frosting. Even after the third spoonful I wasn't certain it was quite yet ready. However all was reaffirmed after I licked clean the beaters and the spatula. I infused as much coffee flavor I could into the buttercream and made sure the cake itself was moist. However I do think it could use more mocha flavor which I revised in the recipe down below. So now I present to you the recipe! Can I also say that sometimes I enjoy elaborately decorating the cake more than the baking process? After getting flour clouds on my shirt and washing the numerous amount of dishes, I feel inclined to make the end product as dolled up as possible. It makes eveything worth it besides the actual consumption! 


Enjoy!
Vanilla Sponge
Yields 1 (6 inch) cake

INGREDIENTS
  • 4 eggs, separated, room temperature
  • 1/2 cup sugar
  • 1/2 tablespoon honey
  • 1/4 teaspoon salt in 3 tablespoons water
  • 1 cup cake flour
  • 1/2 teaspoon baking powder
  • 3 tablespoons cooking oil or melted butter
  • 1/4 teaspoon vanilla bean*
 INSTRUCTIONS
  1. In a large mixing bowl whisk together on medium high speed 1/4 cup of the sugar, honey, salt water and egg yolks until thick and pale. It should have increased in volume significantly.
  2. In another large mixing bowl beat together the remaining 1/4 cup of sugar and the egg whites until stiff peaks have formed.
  3. Put one third of the egg whites into the egg yolk mixture and fold.
  4. Sift flour and baking powder and pour all of it into the egg mixture and mix.
  5. Fold in the rest of the egg whites into the batter.
  6. Whisk the vanilla bean into the oil and then quickly fold it into the batter until well incorporated.
  7. Immediately bake in a preheated oven at 350 for 20 minutes or until cake springs back and is golden brown.
 Vanilla Syrup**

INGREDIENTS
  • 1/2 cup water
  • 1/4 cup sugar
  • 1/4 teaspoon vanilla extract
INSTRUCTIONS
  1. In a saucepan stir together all the ingredients over medium heat.
  2. Once the sugar has dissolved allow the syrup to cool.

Mocha Butter Cream
Yields about 2- 3 cups

INGREDIENTS
  • 3 egg whites
  • 1 cup sugar
  • 1 1/2 - 2 sticks unsalted butter, room temperature
  • 1 tablespoon + 3 teaspoons espresso powder
  • 1 teaspoon cocoa powder
  • 1/4 teaspoon vanilla extract
  • Pinch of salt
 INSTRUCTIONS
  1. Over a double boiler, whisk the egg whites, sugar, espresso powder and cocoa powder until the sugar is dissolved and the mixture reads 160°F on a candy thermometer.
  2. Using a hand mixer beat the whites on high speed until the mixture is cool to the tough and stiff peaks have formed. It should take roughly 10 minutes. ***
  3. Reduce the speed of the mixer down to low and begin adding the butter several tablespoons at a time beating well after each addition. Only add enough butter until the frosting comes together. Add in the vanilla and salt. Continue to beat until the buttercream is smooth and glossy. If for some reason the buttercream becomes soupy, pop it into the refrigerator for 10 minutes and beat again until it becomes fluffy.
NOTES:

* The same volume of vanilla extract can be substituted for the vanilla bean
** This syrup can be used if the sponge cake turns out dry, which mine did. It will moisten up the cake if you brush it on with a pastry brush on each layer before the buttercream. Be careful not to over soak the cake with the syrup however. 
*** My meringue never made stiff peaks, but once the whites have lightened up significantly in color you can start adding the butter. 

Saturday, March 12, 2011

Apple Crispy

Pin It
3.14159... something something.  I'll just use the pi button on my calculator! It's there for a reason. Why memorize?
The reason for the grammatically challenged title was because of my mother. My sister called today and my mom was telling her about what I baked. Yes, she called my pies apple crispy O_o. Apple crispy!? I don't understand! Yes the pies have apples. Yes they are crispy. Ergo apple crispy? No, but I shall let my mother continue to describe apple pie as apple crispy. Let's keep everyone happy. 

Anyway, pi day is just around the corner. This Monday actually, and so to celebrate I made apple pie! Now the pies aren't necessarily circular, but who cares, it's PIE. 

The main reason I made these pies was to utilize some filo dough that had been sitting in the freezer since this past Christmas when I made baklava. Which by the way was tasty. It was one of the cookies I made for some friends as gifts for the holiday and although they were good I didn't want to make them again. I love trying new things. This was another one of my experimentations but luckily I used measuring devices instead of tossing in pinches and handfuls of ingredients.  Therefore my recipe should be accurate unless my memory fails me.

I liked the pies and so did my dad. Then again that doesn't say much because we both have extreme sweet tooths. Anything sweet is satisfying, however these were successful. The filling was flavorful while the filo crust was crispy. The layers of butter in between seemed to help puff up the pies because they certainly weren't as big as you see in the pictures when i popped them into the oven. However, I think I'll just stick to regular pie crust or even puff pastry because with every bite it seemed as if the filo just crumbled in its delicacy. At least it was able to sustain all the apples I shoved inside. 
My class is also having a celebration in math for pi day. We all know that's my teacher's excuse to get out of instructing a lesson and to chow down on some pie. I can't complain though. This week is going to be torture. I just finished a whole week of testing and now I have a regular school schedule before spring break. Are you serious!? It's okay though. All my teachers are getting really lazy because they could use a vacation too and they also work at a public school. There're no high expectations honestly.  

Now for the rest of the weekend I have to go study! No more kitchen time for me.

Enjoy!

Wednesday, March 9, 2011

Creamsicle Cupcakes on Accident

Pin It
First off, frosting just hates me. I've never been able to make the luscious topping in one go. Every time I end up dumping this thin sugary concoction into the trash because something just has to go wrong. This time I tried making a simple confectioner's sugar and butter frosting in attempts to make a mango buttercream. FAIL. I wasted the liquid gold, the mango purée, after trying to incorporate it into the butter and sugar. Maybe I added too much, but without the amount I introduced it just tasted like butter. In the end it was a curdled mess even after 20 minutes of constant beating. Into the trash can it went.
I had no mango left and so I had to scratch that flavor off my list. Instead I had some lovely oranges I bought last week and well they seemed promising. Look at how juicy it is!
So I started to make a cooked frosting that seemed simple enough and boy was it worth it. The frosting was creamy and tart and apparently tasted like a creamsicle according to my family. Now the sad part... I had no clue what they were talking about. I've only had one of these childhood staples once in my life, which was recently when I revealed to my eldest sister I was deprived of them. Heck. I didn't know what a creamsicle was. I mean what kind of name is that!?

The cupcake was pretty delicious too. I've been on the quest to find that perfect vanilla cupcake recipe because some just fall flat in my opinion *cough* Magnolia's *cough*.  They always seem to turn out dense and flavorless. How much vanilla extract do I need to add!? Then a thought came to me, Remember those Betty Crocker box cake mixes? I recall a little icon saying there was pudding added and so I took the initiative and added instant jell-o pudding to my batter. The result... DELICIOUS. I have no other adjective in my vocabulary to describe something that tasted good. It was concentrated vanilla in a cupcake. It was also moist but not to the point where it falls apart because it's so delicate. Yeah, that's happened to me too.

Now since this was a basically an experiment I shall give you guys the recipe that I can devise after sifting through my thought process when making these cupcakes. Please remember that I can't really remember. Lol. Uhhhh. Okay. I add ingredients according to how it tastes. A dash more salt. A splash more vanilla. Whatever seems to be missing I throw it in. I will continue to modify this vanilla cupcake to fit my tastes. Someday it will become the golden.

Enjoy!

Vanilla Cupcake
Loosely adapted from smittenkitchen
Yields 6 cupcakes

INGREDIENTS
  • 1 cup all purpose flour
  • 2 tablespoons vanilla pudding mix
  • 1/2 teaspoon baking powder
  • 1/4 teaspoons baking soda
  • 1/4 teaspoon salt
  • 1/2 stick unsalted butter, softened
  • 3/8 cup sugar
  • 3/4 teaspoon pure vanilla extract
  • 1 large egg, at room temperature
  • 1/2 cup buttermilk, well-shaken
INSTRUCTIONS
Preheat oven to 350°F
  1. Sift together flour, baking powder, baking soda, pudding and salt in a medium bowl. Set aside.
  2. In a large mixing bowl, beat butter and sugar in a large bowl with an electric mixer at medium speed until pale and fluffy, then beat in vanilla. Add egg, beating well and scraping down the bow to incorporate well.
  3. At low speed, beat in buttermilk until just combined Add flour mixture in three batches, being careful not to over mix.
  4. Fill cupcake liners 2/3 full and bake for 15 minutes or until a toothpick inserted into the center of one comes out clean.
Orange Buttercream
Loosely adapted from Magnolia
Yields enough to frost 6 cupcakes

INGREDIENTS
  • 1/3 cup milk
  • 1/2 cup orange juice
  • 1/2 teaspoon orange zest
  • 2 tablespoons all purpose flour
  • 1/4 cup butter, room temperature
  • 2/3 cup sugar
  • 3/4 teaspoon orange extract
  • 1/4 teaspoon vanilla extract
INSTRUCTIONS
  1. In a small sauce pan reduce the orange juice until thick over medium heat. Then add the  milk, flour and orange zest, whisking constantly until the mixture becomes thick. About 10 minutes. Take off heat and allow to cool to room temperature.
  2. In a small bowl beat the butter for a few minutes. Add the sugar and beat until pale and fluffy. Do not worry, it should look grainy.
  3. Add in the cooked milk mixture and beat until frosting becomes significantly lighter in color.
  4. Add in the orange and vanilla extract. At this point you can also add more sugar and beat until dissolved if you prefer a sweeter frosting. Use immediately!

Saturday, March 5, 2011

Panera Inspired Chocolate Mint Crinkles

Pin It
I went to Panera Bread last week and aside from my usual entré that i get every single time, aka the frontega chicken with broccoli cheddar soup, I had the opportunity to split their chocolate mint crinkle with my sister. Yes, I lack variety in my life. Once you've found that one menu item it's hard to deviate away from it, am I right? Anyway, it was DELICIOUS! So fudgy, chocolaty, minty, and just the perfect way to end my meal. Now I know it's really sad that I couldn't stop thinking about these cookies and that I became possessed to try to clone these treats at home, but I must say I did a decent job. Just enough mint flavor. The hardest part about making these cookies is basically waiting for the dough to chill before you can shove those babies into the oven! Try the recipe out!
I'm also content and mildly satisfied with how the pictures developed. It's been ages since I had made contact with my dad's Nikon camera. The quality is beyond that of my phone that I can't even fathom why I neglected this camera for so long. Then again the soreness in my arm might be the result from holding it up. I don't understand why it's so heavy!? My arm started to cramp while trying to focus the lens for a particular shot. Pathetic. Oh well, cookies make every form of pain go away whether it be emotional or physical so I shall go secretly munch on some right now.
Did I ever tell you guys how much I love my dad's English? He tends to mock the colloquial language I use like epic fail, shiz bombs, oh-la-my-goodness-ah!..etc. The word delicious-ah is also excessively exhausted in my daily conversations. I rarely swear so wipe that smirk off your face and don't laugh at my weird phrases. Back to the story, the family was talking about one of my sisters during dinner and I was saying she epically failed at whatever we were talking about because it's all so vague in comparison to what followed in the conversation.  He replies with, "Oh yes, she fail, " then goes on to eat a cookie and says, "Delicious-ah!" So funny. Maybe you had to be there. Wish I had a camera to record that moment...

Enjoy!

Dark Chocolate Mint Crinkles
Adapted from bakersroyale
Yields 1 dozen cookies

INGREDIENTS
  • 3/4 cup plus 1 tablespoons all-purpose flour
  • 3/4 teaspoons baking powder
  • 1/4 teaspoon salt
  • 4 ounces dark chocolate, finely chopped
  • 1 1/4 cups sugar
  • 2 tablespoons olive oil*
  • 1 1/2 tablespoons unsalted butter, melted and warm
  • 1 tablespoon light corn syrup
  • 1 large egg
  • 1 teaspoon vanilla extract
  • 11/4 teaspoon peppermint extract
  • 1/3 cup semi-sweet chocolate chips, lightly coated in flour
  • 1/2 cup powdered sugar
INSTRUCTIONS
  1. Sift together the flour, baking powder, salt and then set aside.
  2. Heat chocolate in either the microwave or a double boiler until melted being careful not to scorch it.
  3. In a mixer on medium speed, beat together the sugar, oil, butter and corn syrup until well incorporated. Beat in the egg, vanilla and peppermint extract.
  4. Turn the mixer down to low speed and beat in the melted chocolate followed by gradually adding in the flour mixture until mixed in completely, but do not over beat. Lastly add in the chocolate chips. Wrap the dough in plastic wrap and refrigerate for about one hour or until firm.
  5. Preheat the oven to 325°F. Line a baking tray with parchment paper. Take the dough out from the refrigerator and form 2 inch balls, more or less depending on how large you want your cookies to be.
  6. TIP: Use a small ice cream scoop to obtain uniformly sized cookies.
  7. After shaping the dough, roll the balls heavily in the confectioner's sugar.
  8. Arrange the cookies 2 inches apart on the baking sheet because they expand quite a bit while baking. Bake for 12-14 minutes for a crisp texture or 10-12 for a chewier end product depending on your oven of course.
  9. Let the cookies cool and enjoy! Be sure to store these in an air tight container to keep the desired texture.
NOTES:

*I used olive oil because I didn't have any vegetable oil on hand, however just use whatever oil that you have in your pantry.
Do not leave these out in the open for too long. I left mine unwrapped overnight and I woke up to hard cookies. Sad day.
Related Posts Plugin for WordPress, Blogger...
Pin It button on image hover